Wednesday, April 30, 2014

Inspiration Journal April Challenge: A Few of My Favourite Things

Okay, last project for tonight - I promise!  ;-)

This project was created for Inspiration Journal's April challenge ("A Few of My Favourite Things"), and is also being submitted to SimonSaysStamp's Wednesday challenge ("Anything Goes").
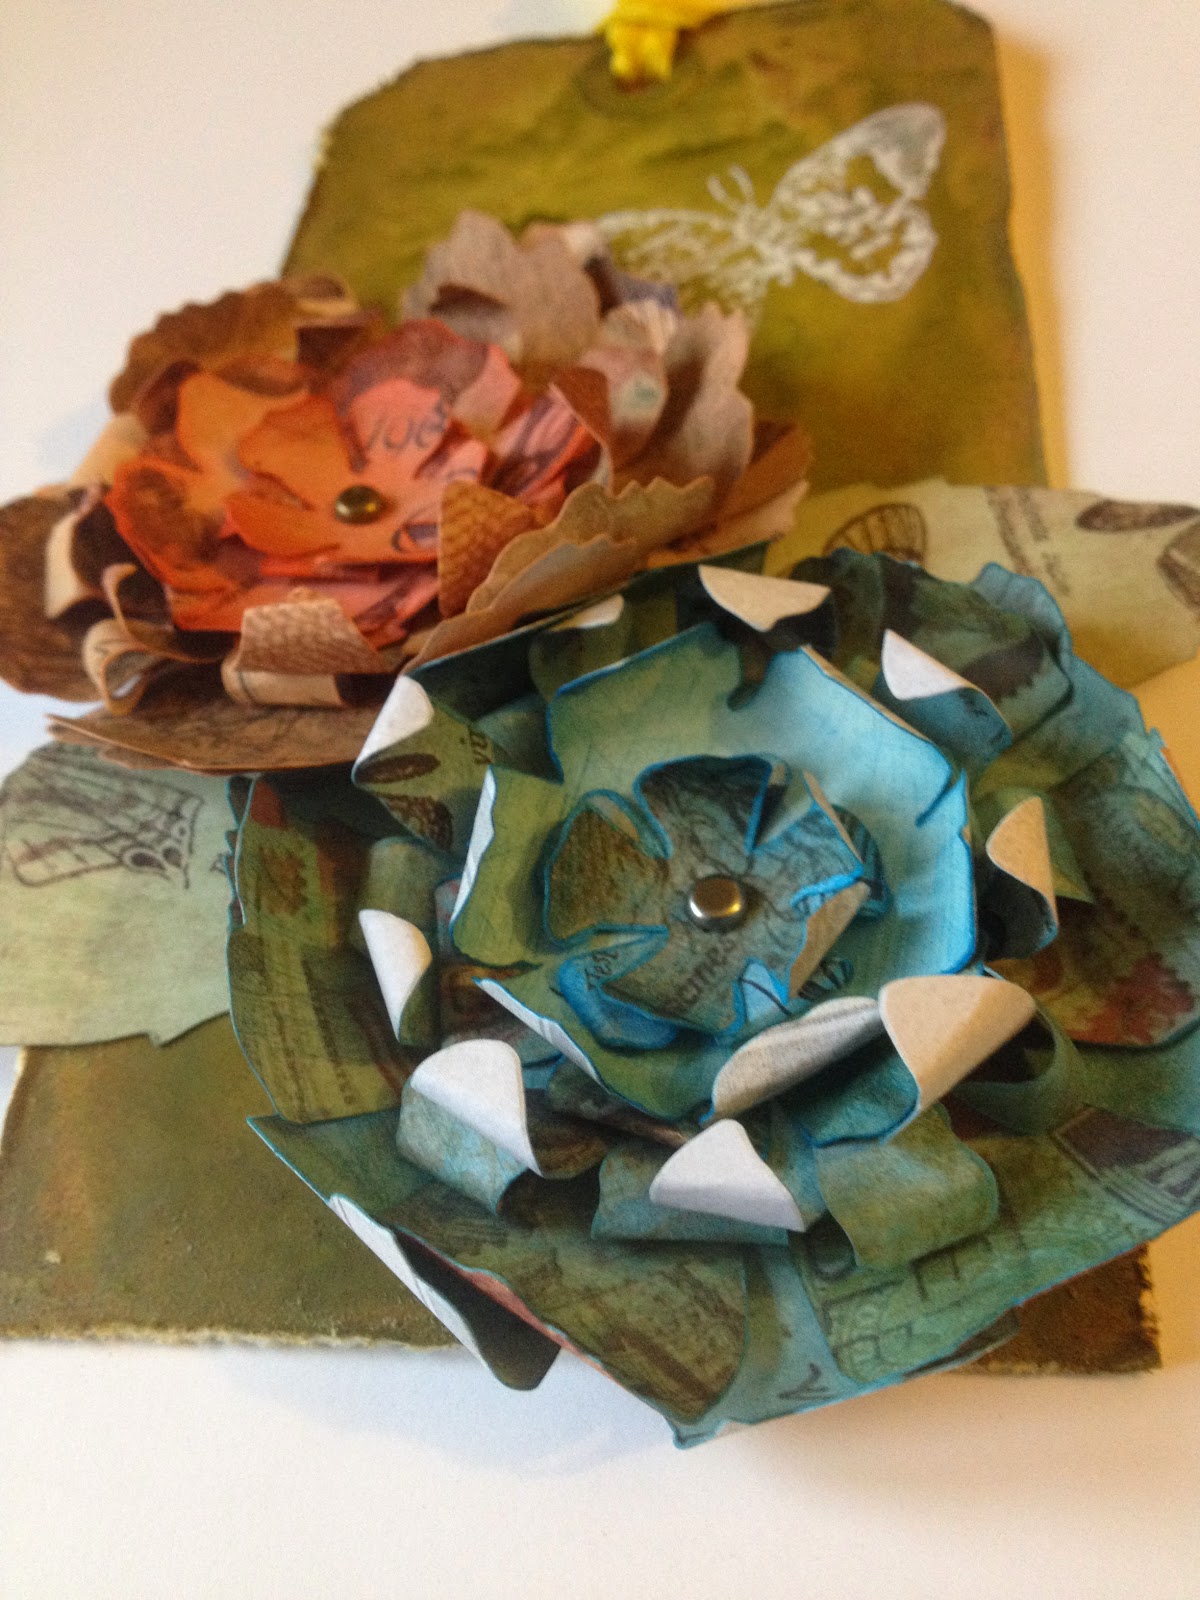
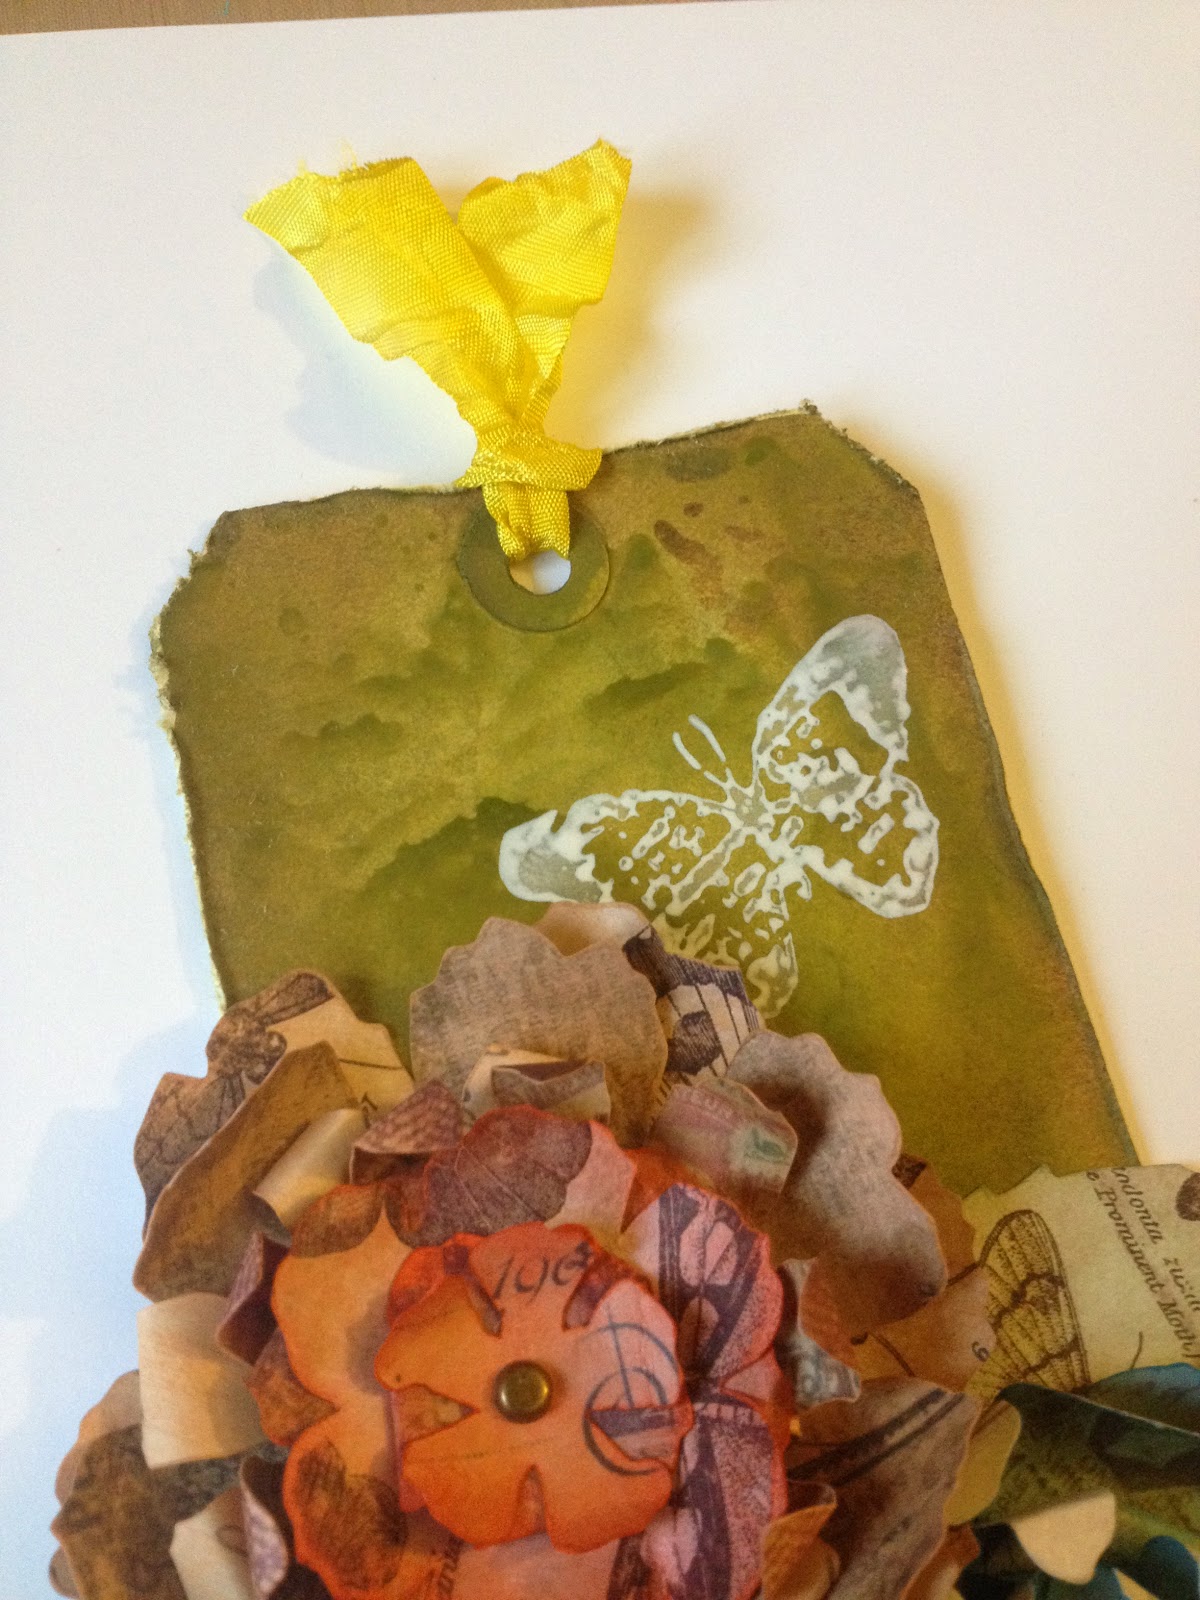
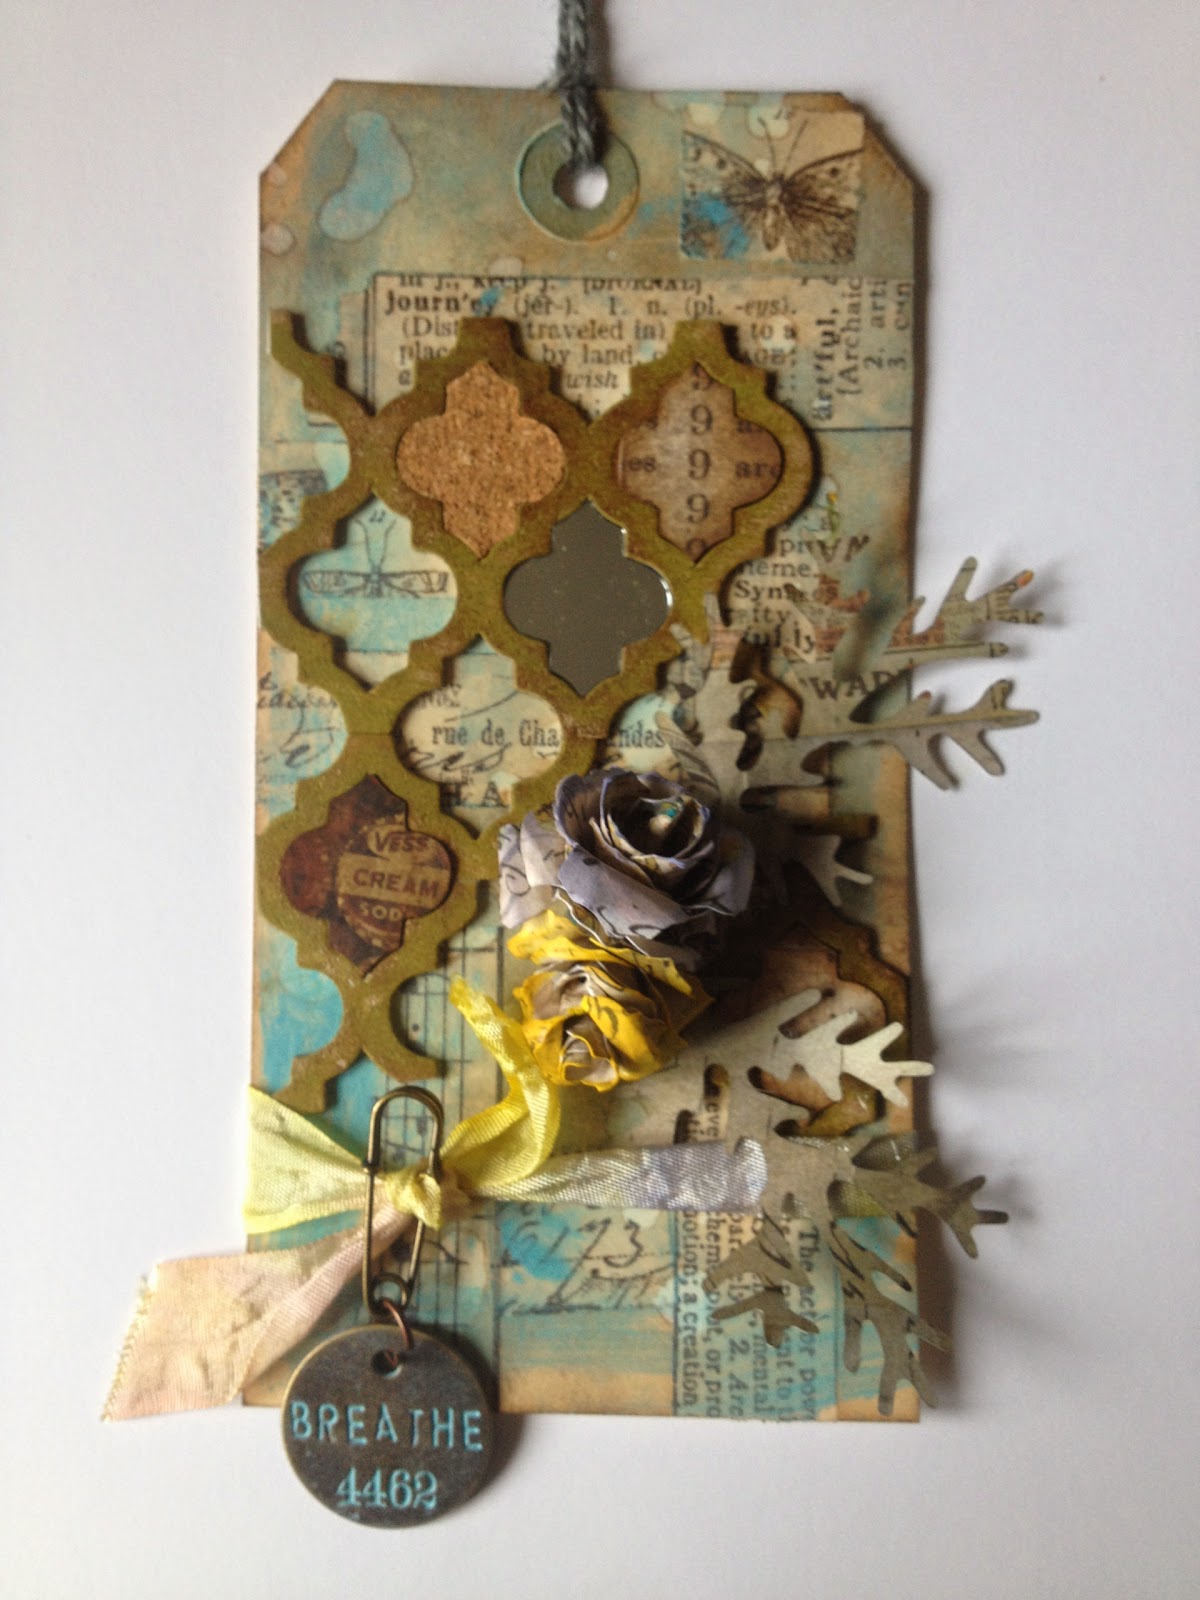
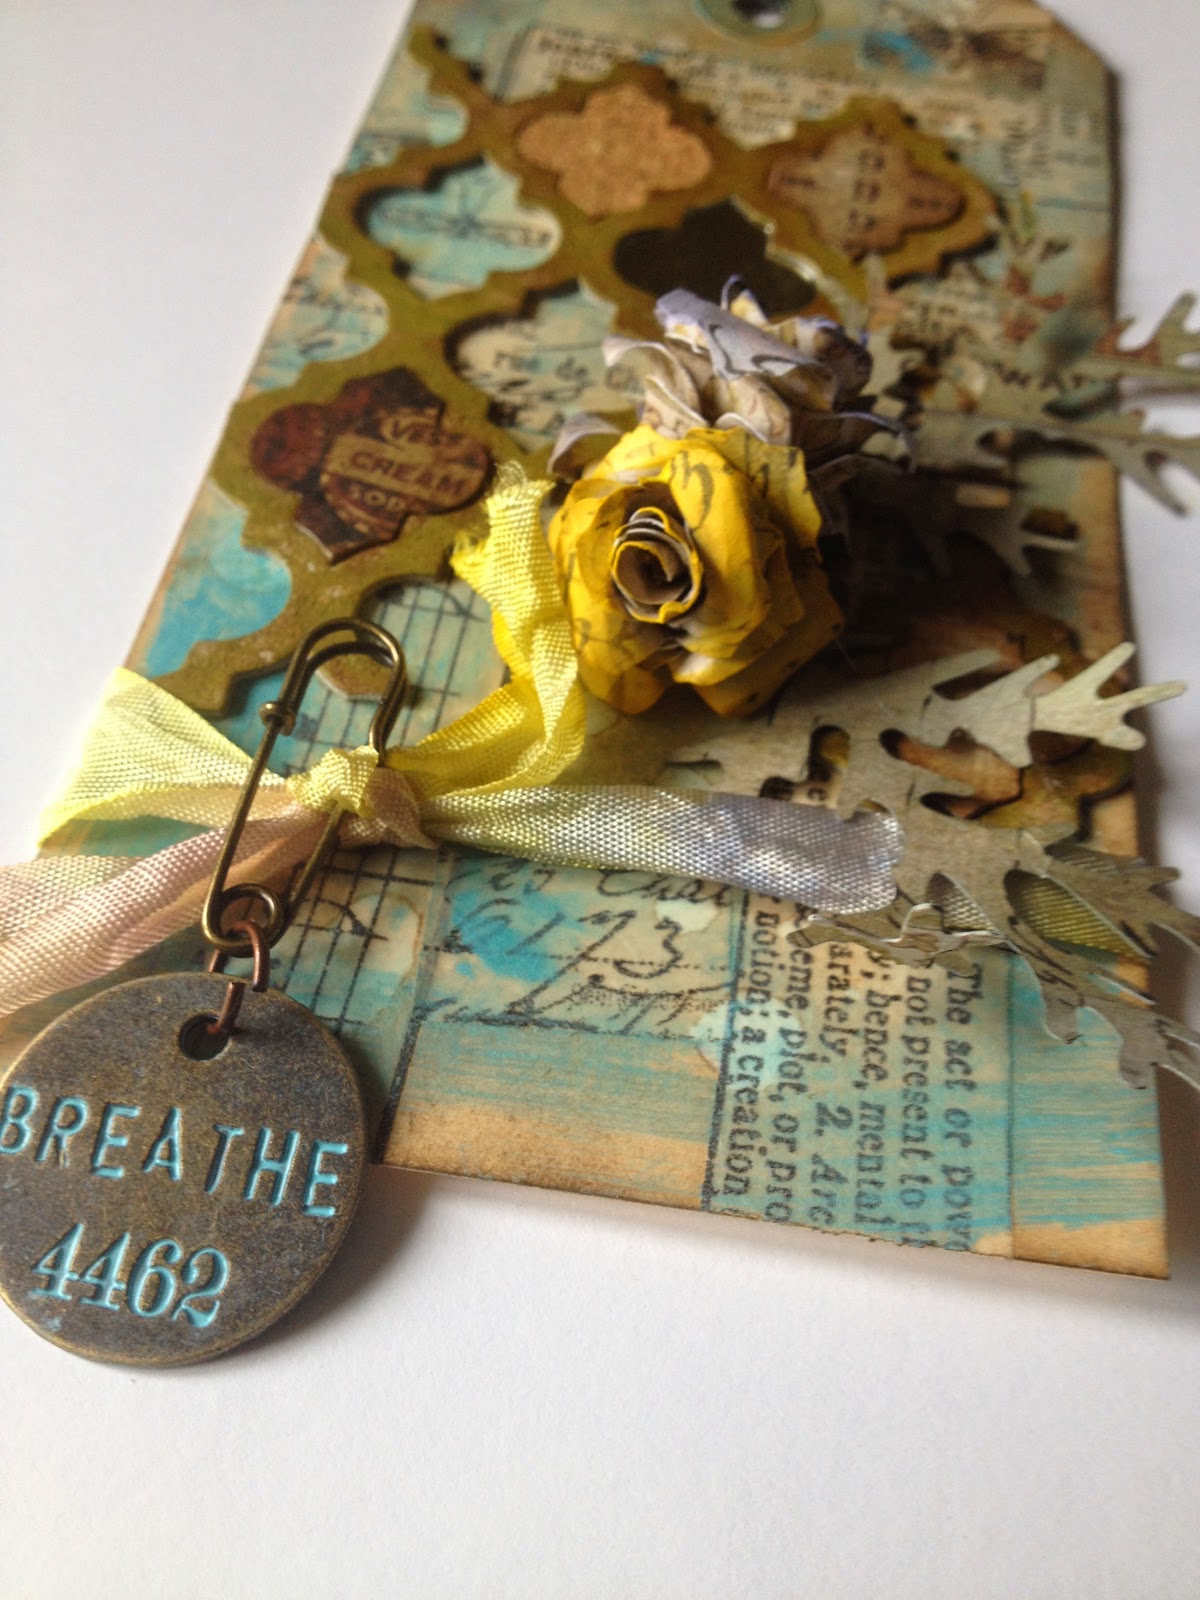
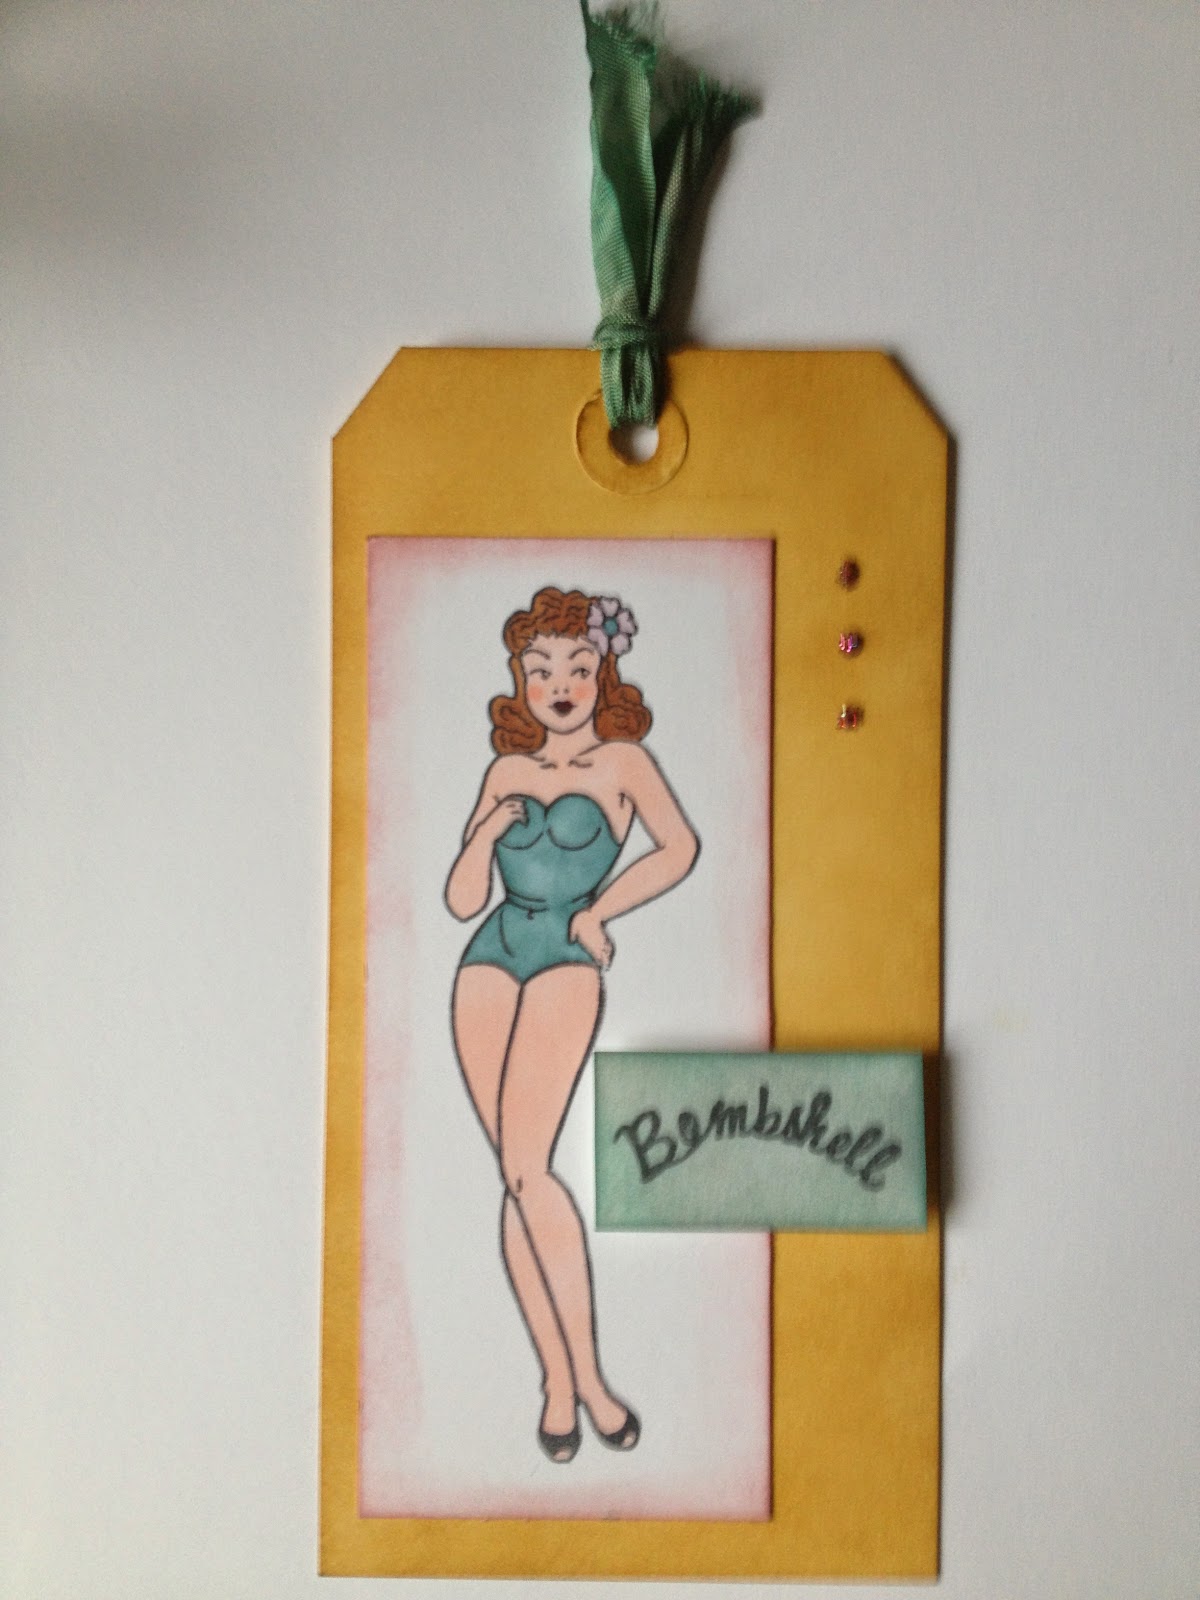
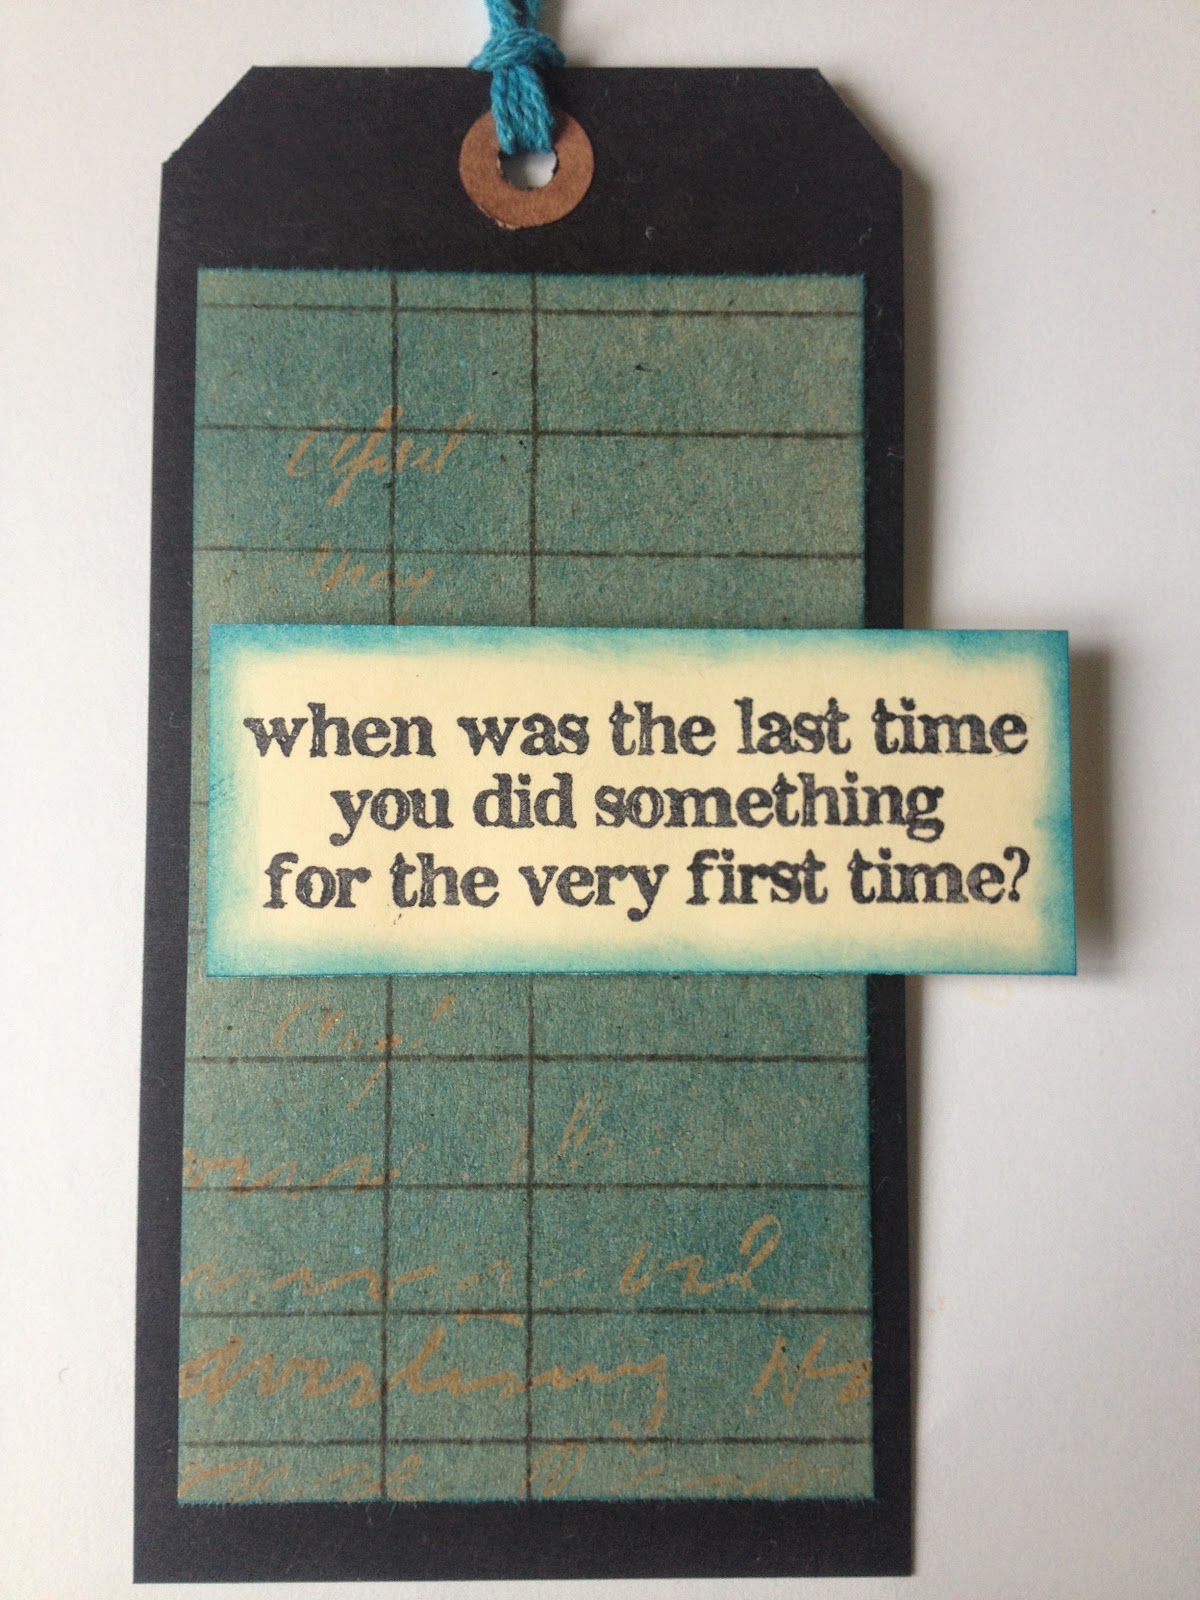
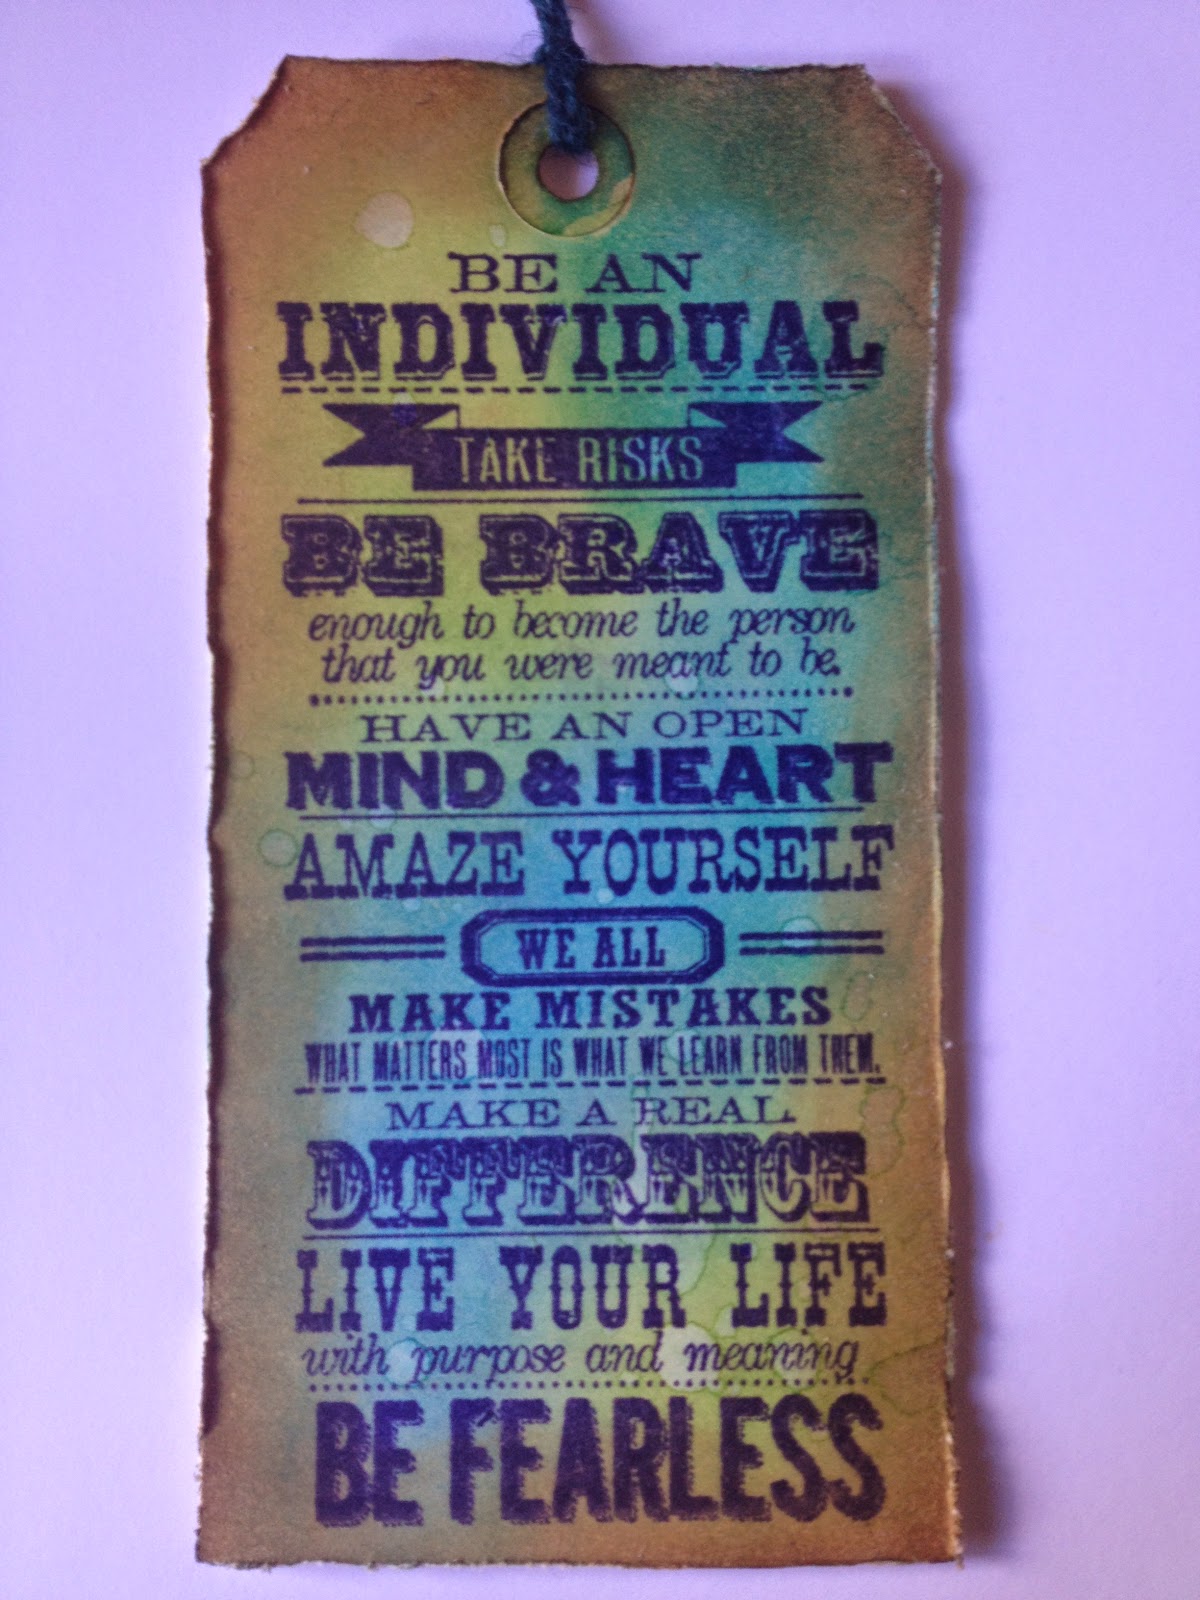
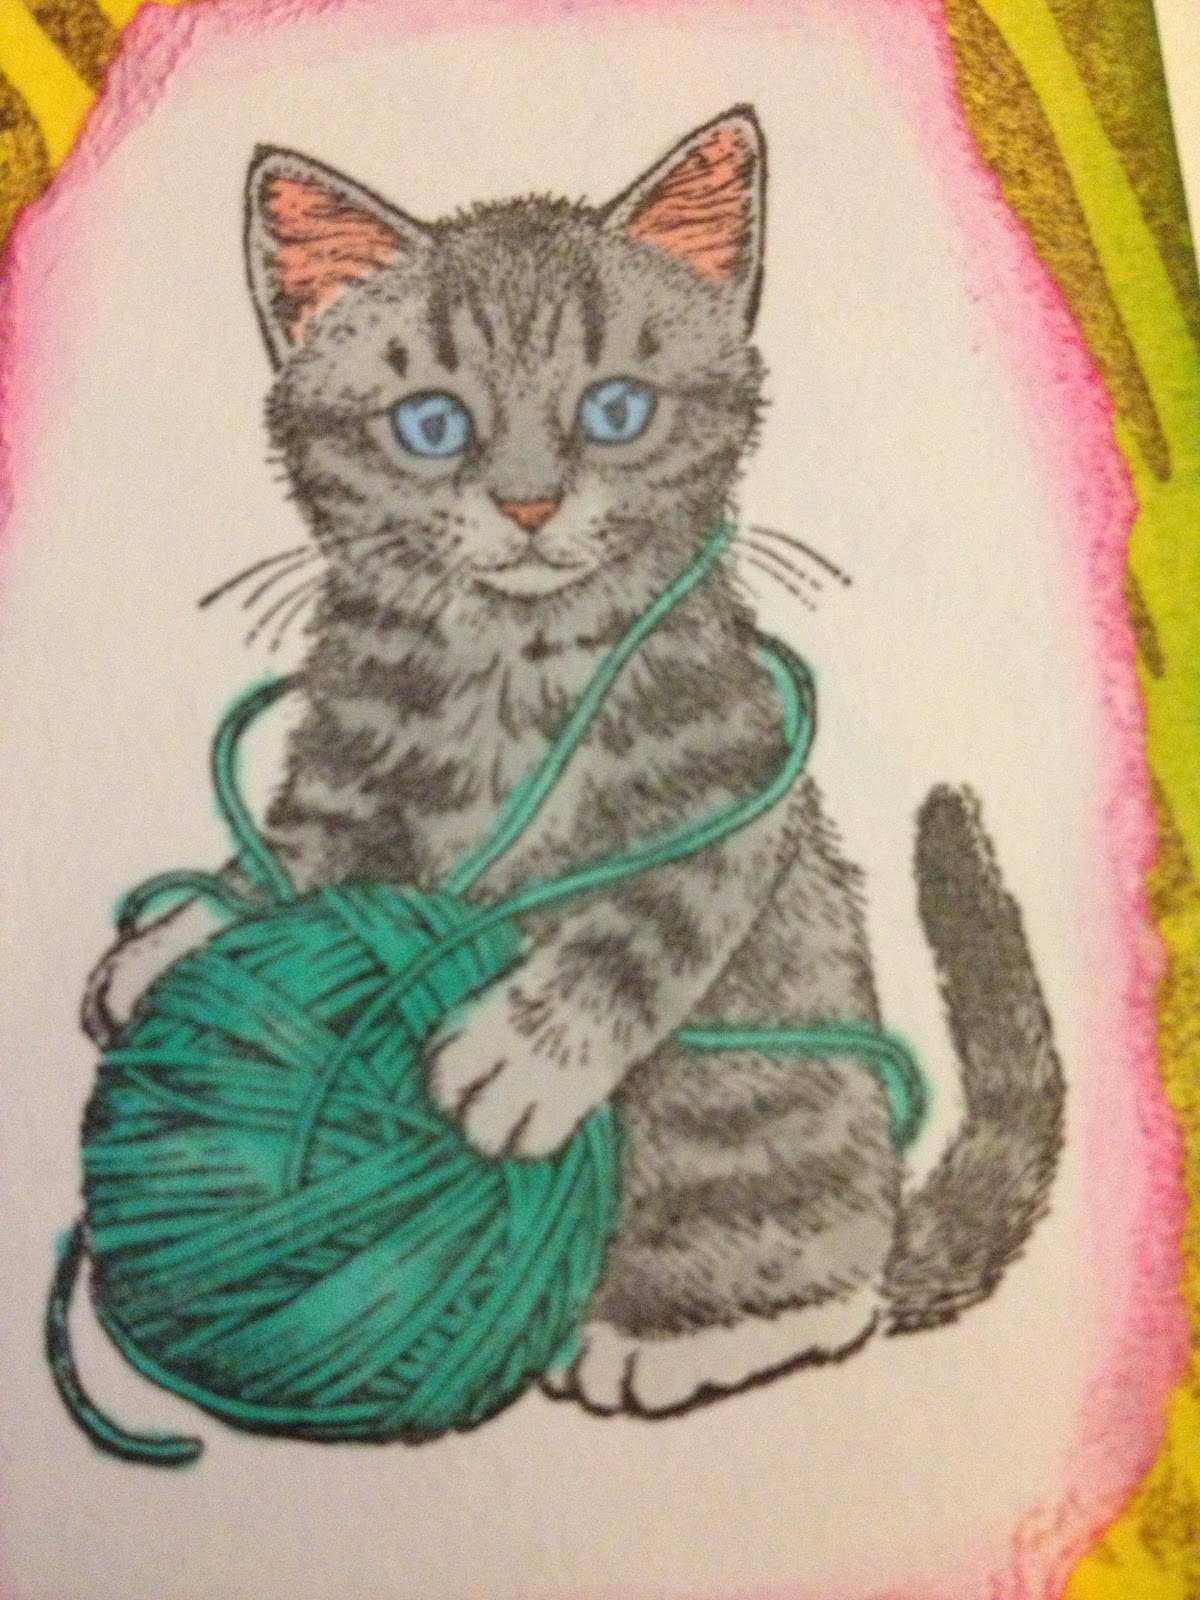
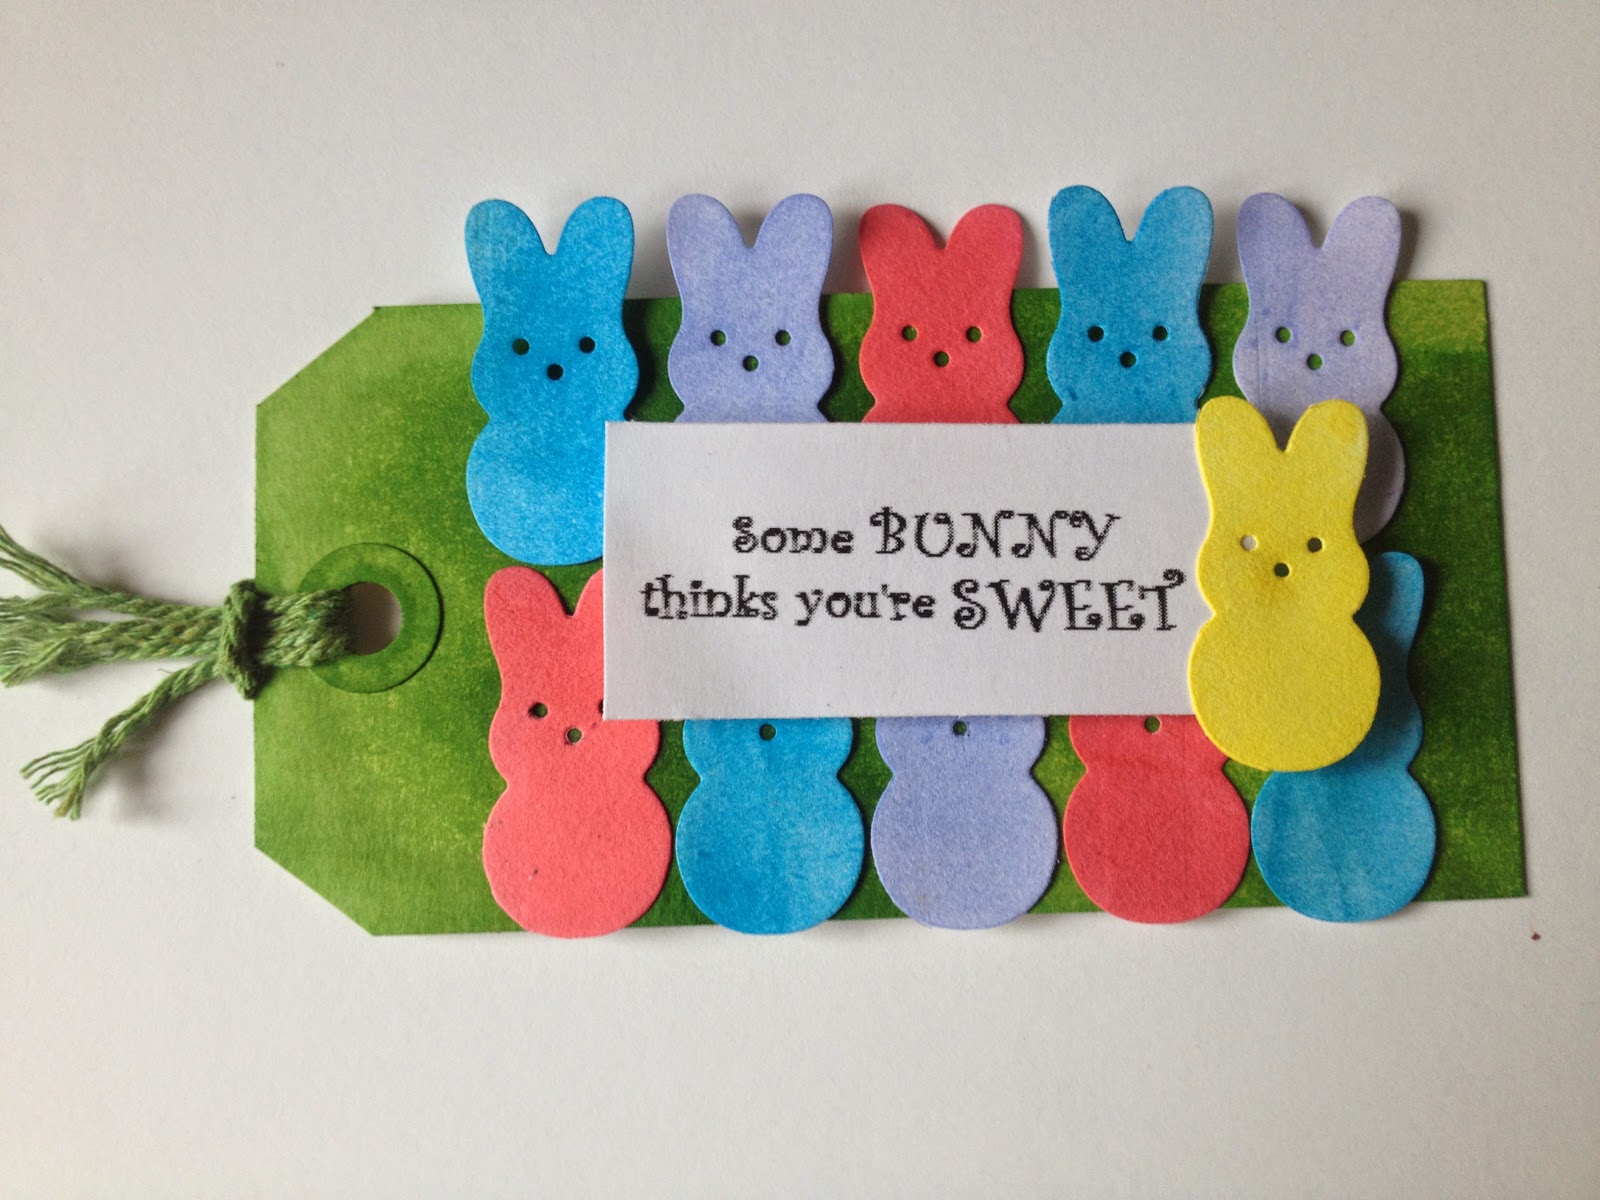
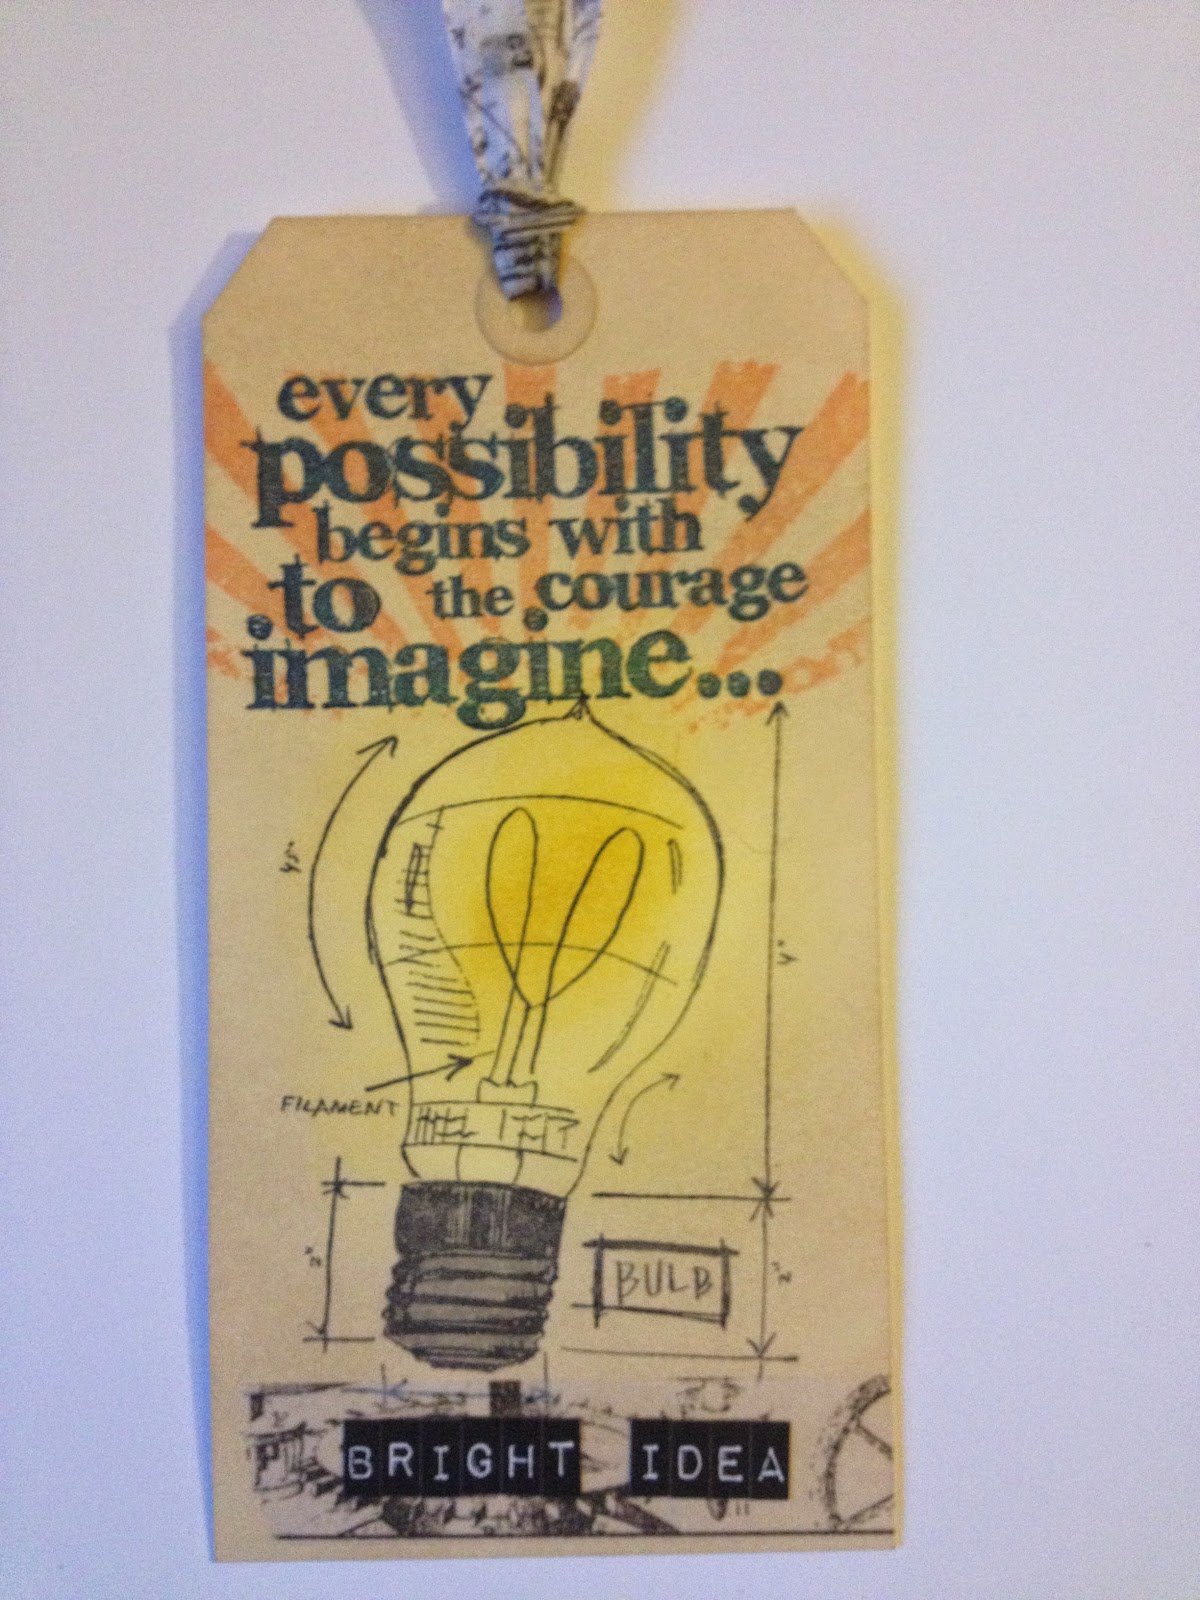
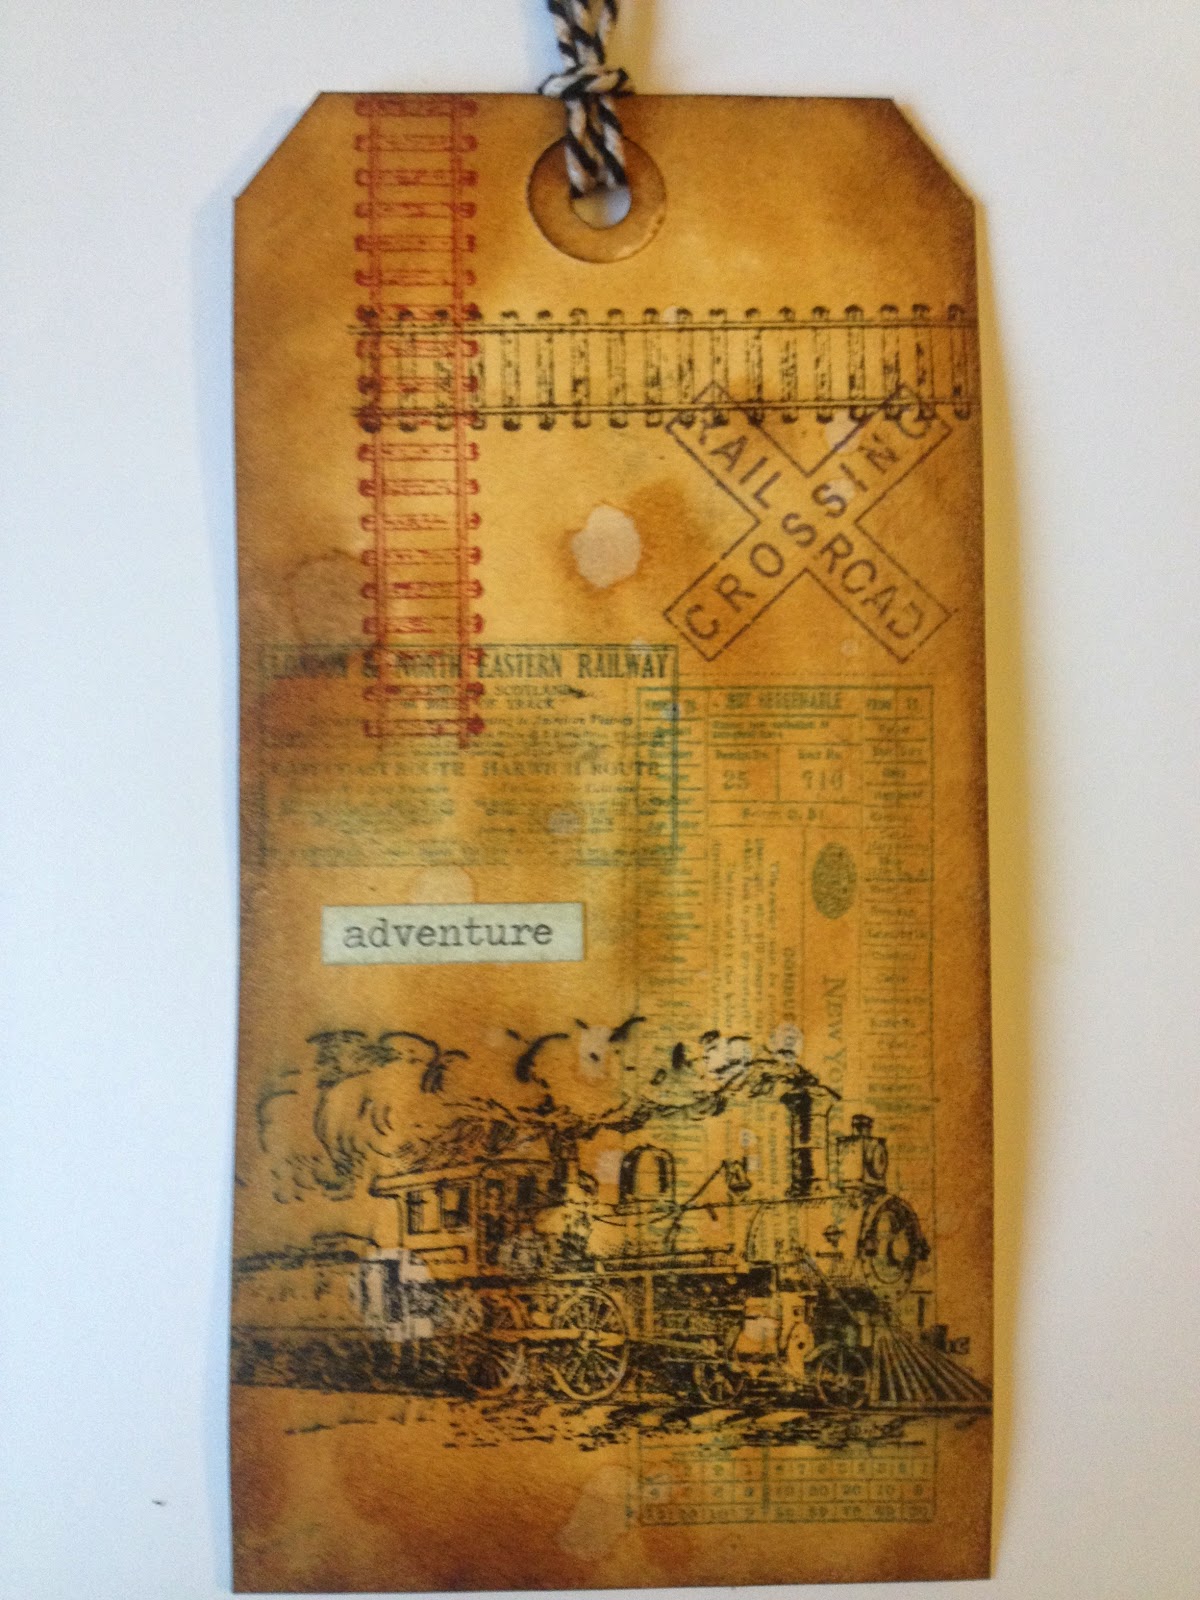
Here's my tag:


Materials/tools used:
 - Ranger Inkssentials Manila tags
 - Ranger Distress Ink: Antique Linen, Black Soot, Chipped Sapphire, Dusty Concord, Fired Brick, Stormy Sky, Vintage Photo, Walnut Stain
 - Ranger Distress Stain: Tea Dye
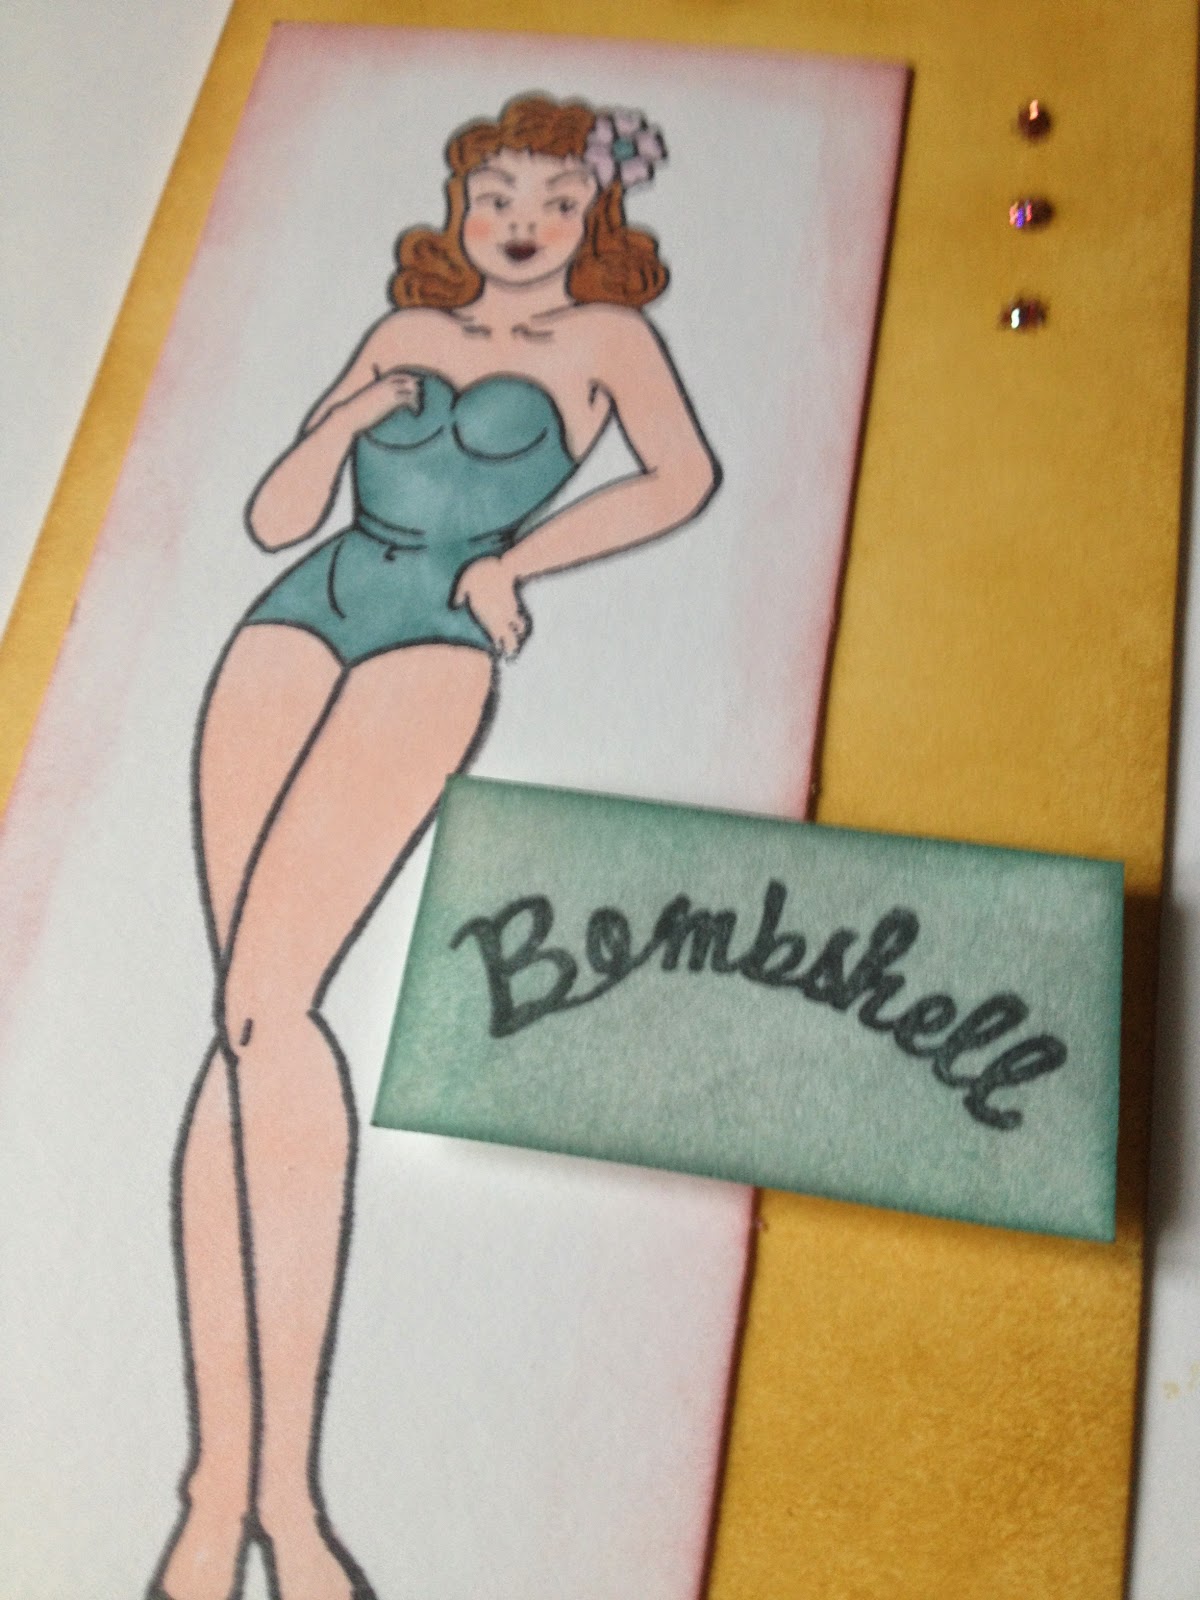
 - idea-ology Chit Chat
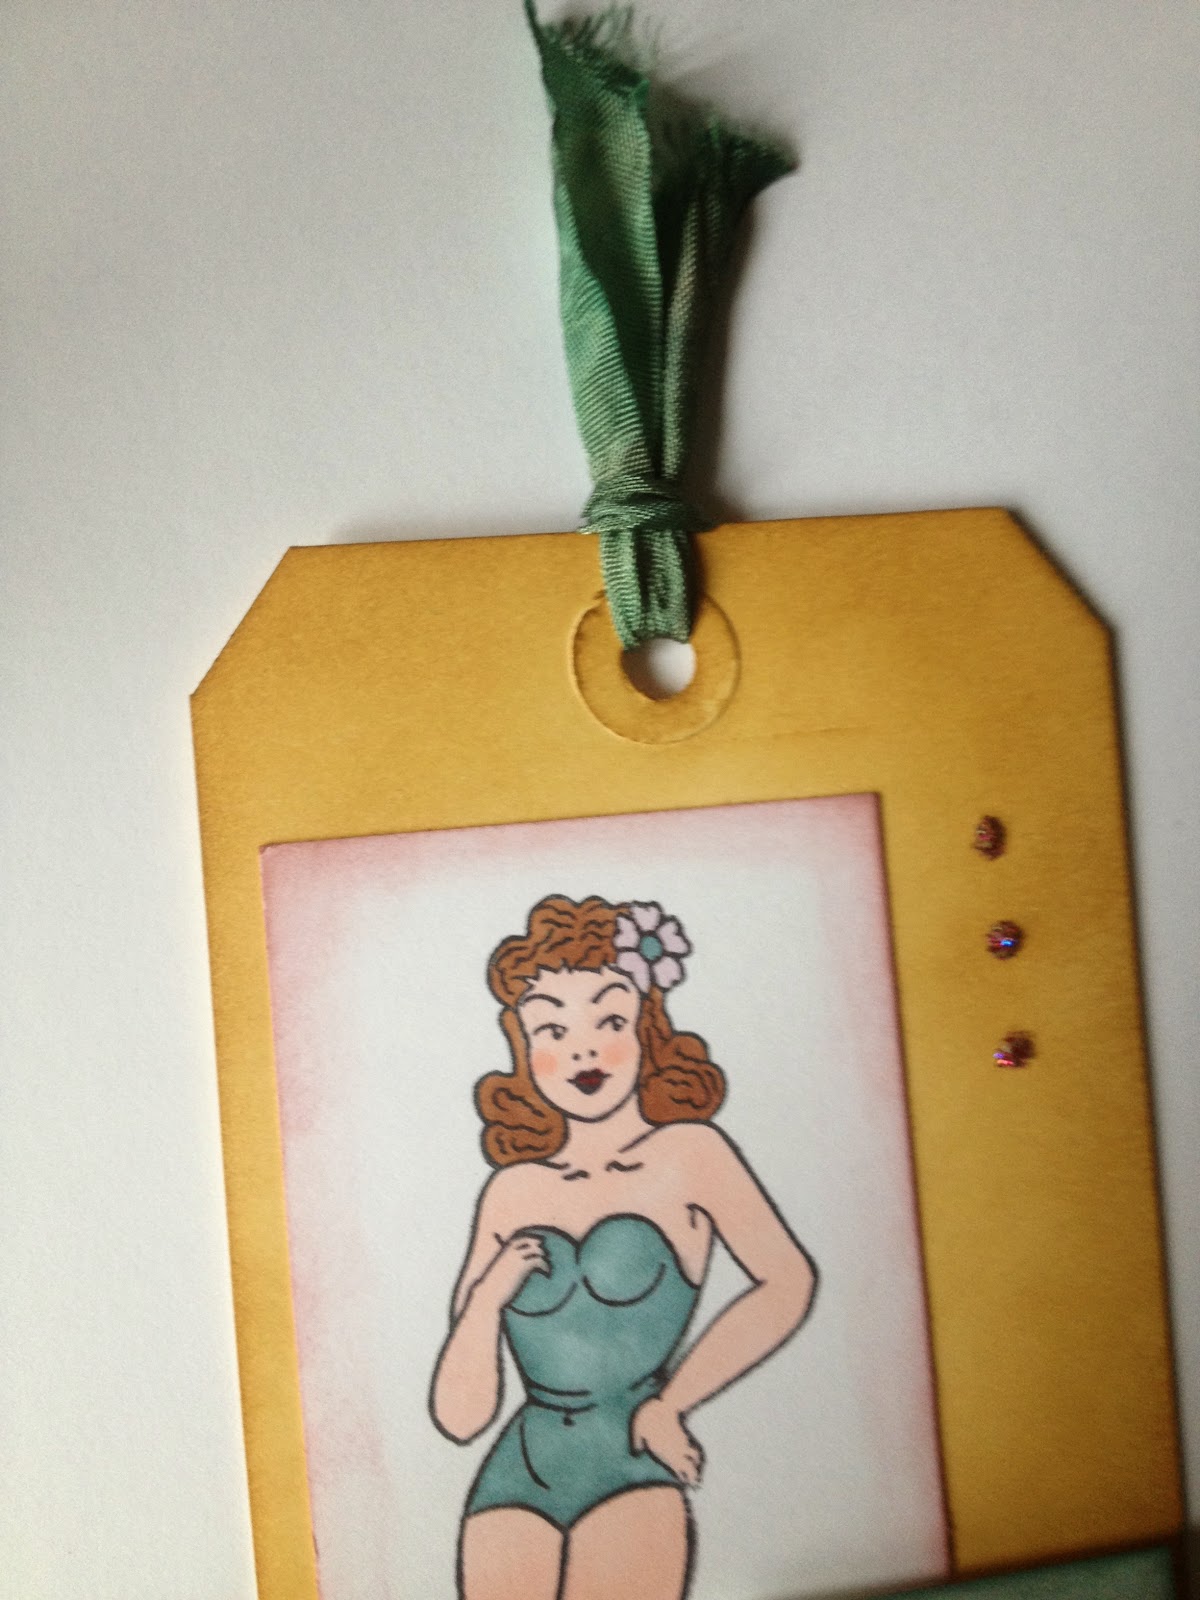
 - Maya Road Twine Cording: Blackberry
 - Ranger Heat Tool
 - Ranger Inkssentials Foam Blending Tool
 - Ranger Inkssentials Mister
 - Tonic Studios Craft Scissors
 - Stamps by Tim Holtz for Stampers Anonymous: CMS162, CSS25900

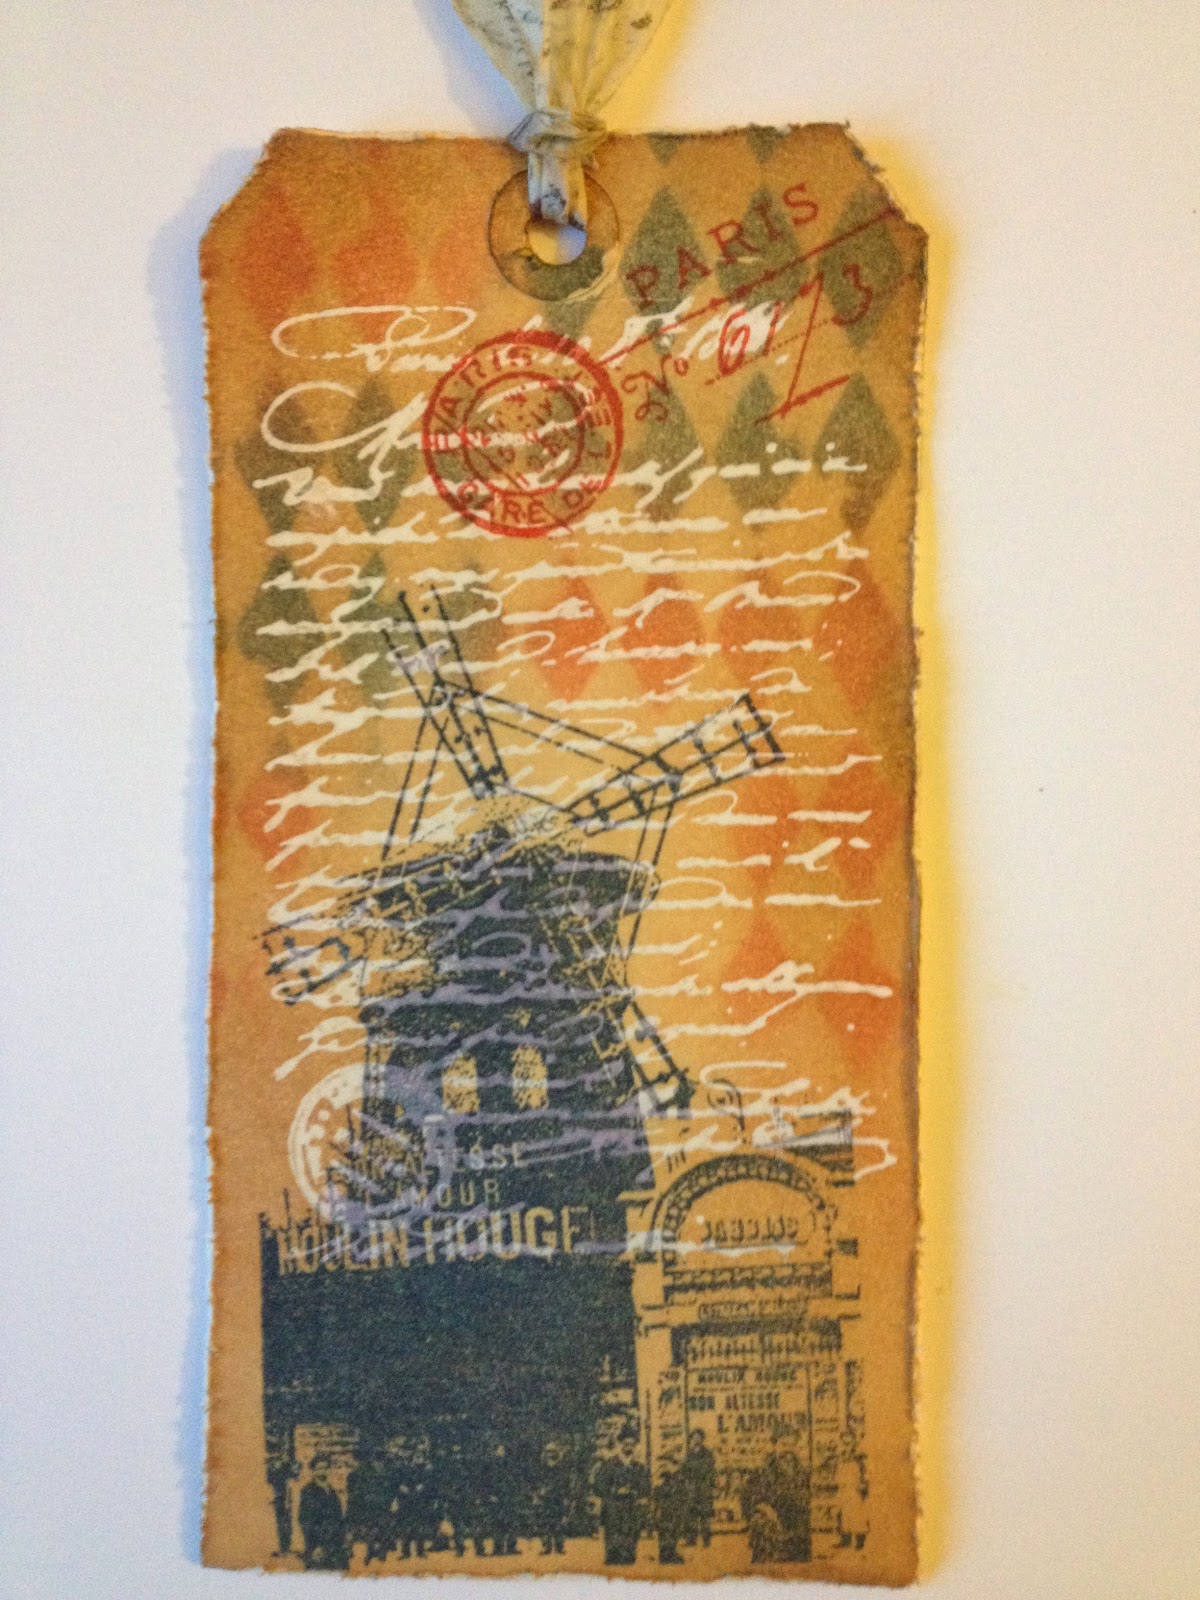
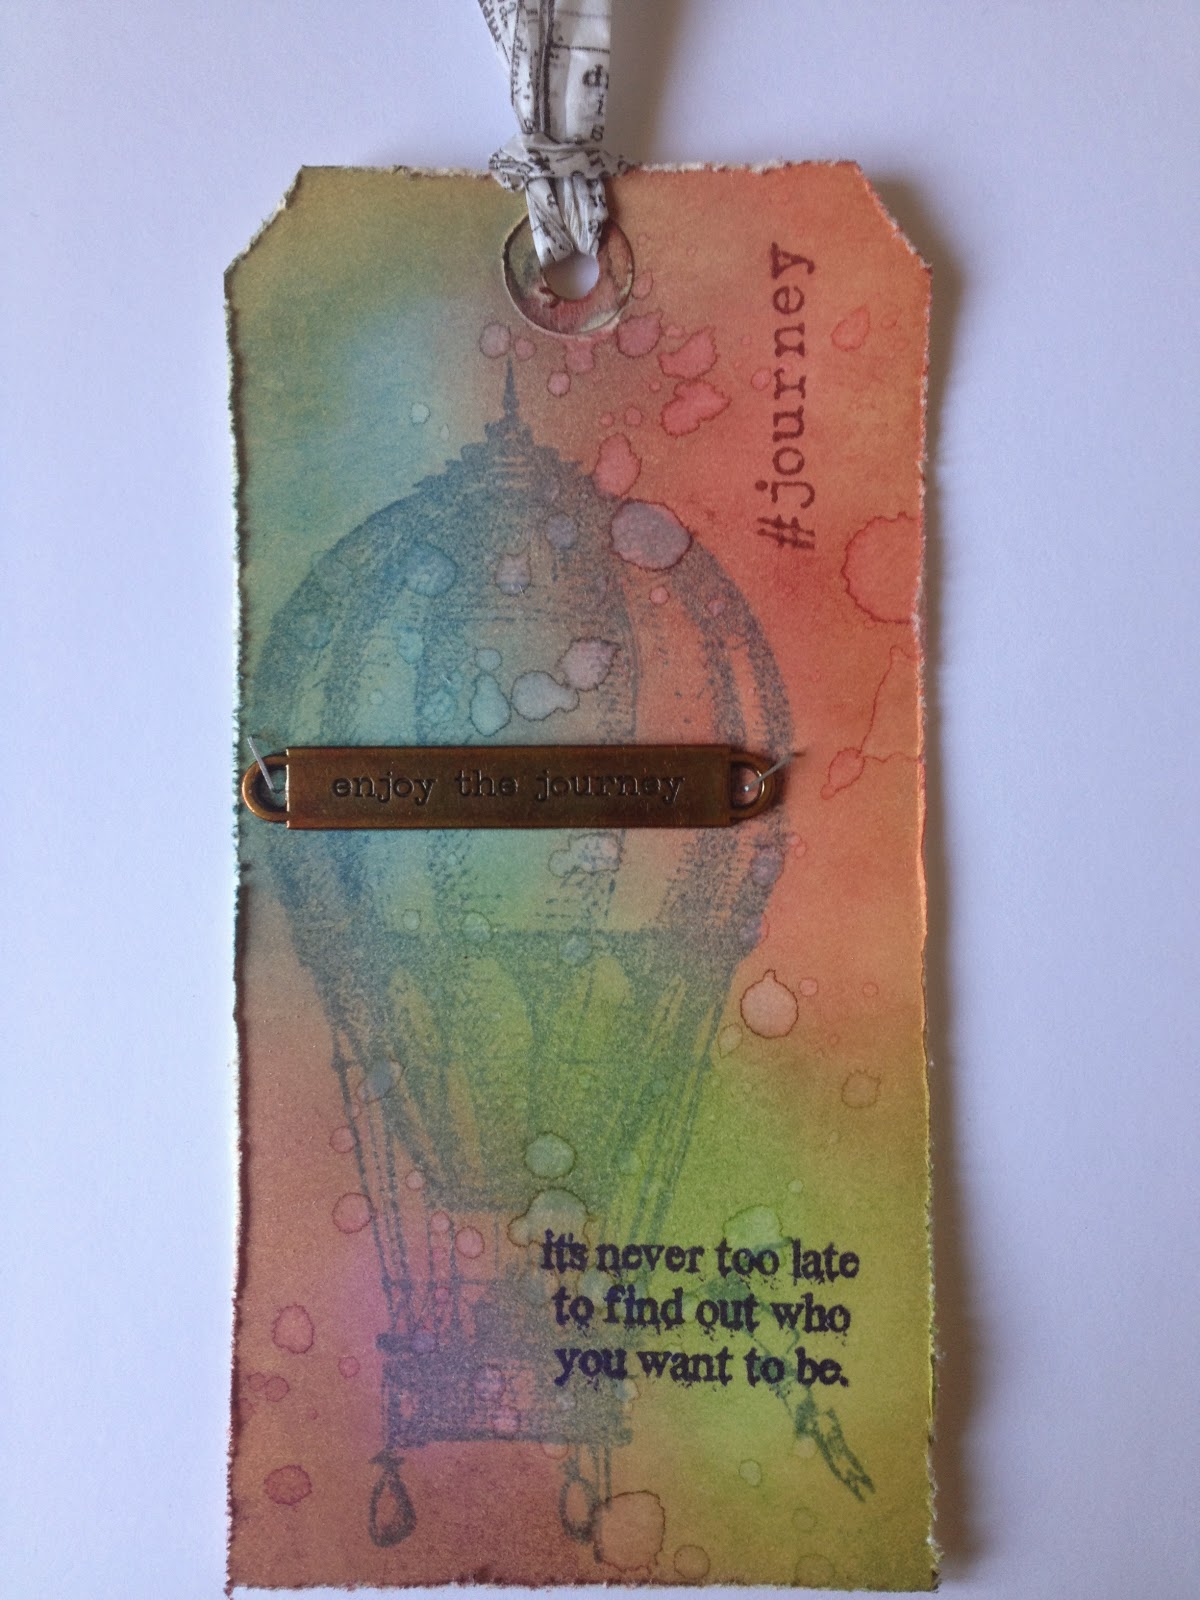
Ever since I was a little kid, I've thought trains were cool.  So, since I've already submitted a Moulin Rouge tag to this challenge this month, I figured trains would be a fun theme.  :-)

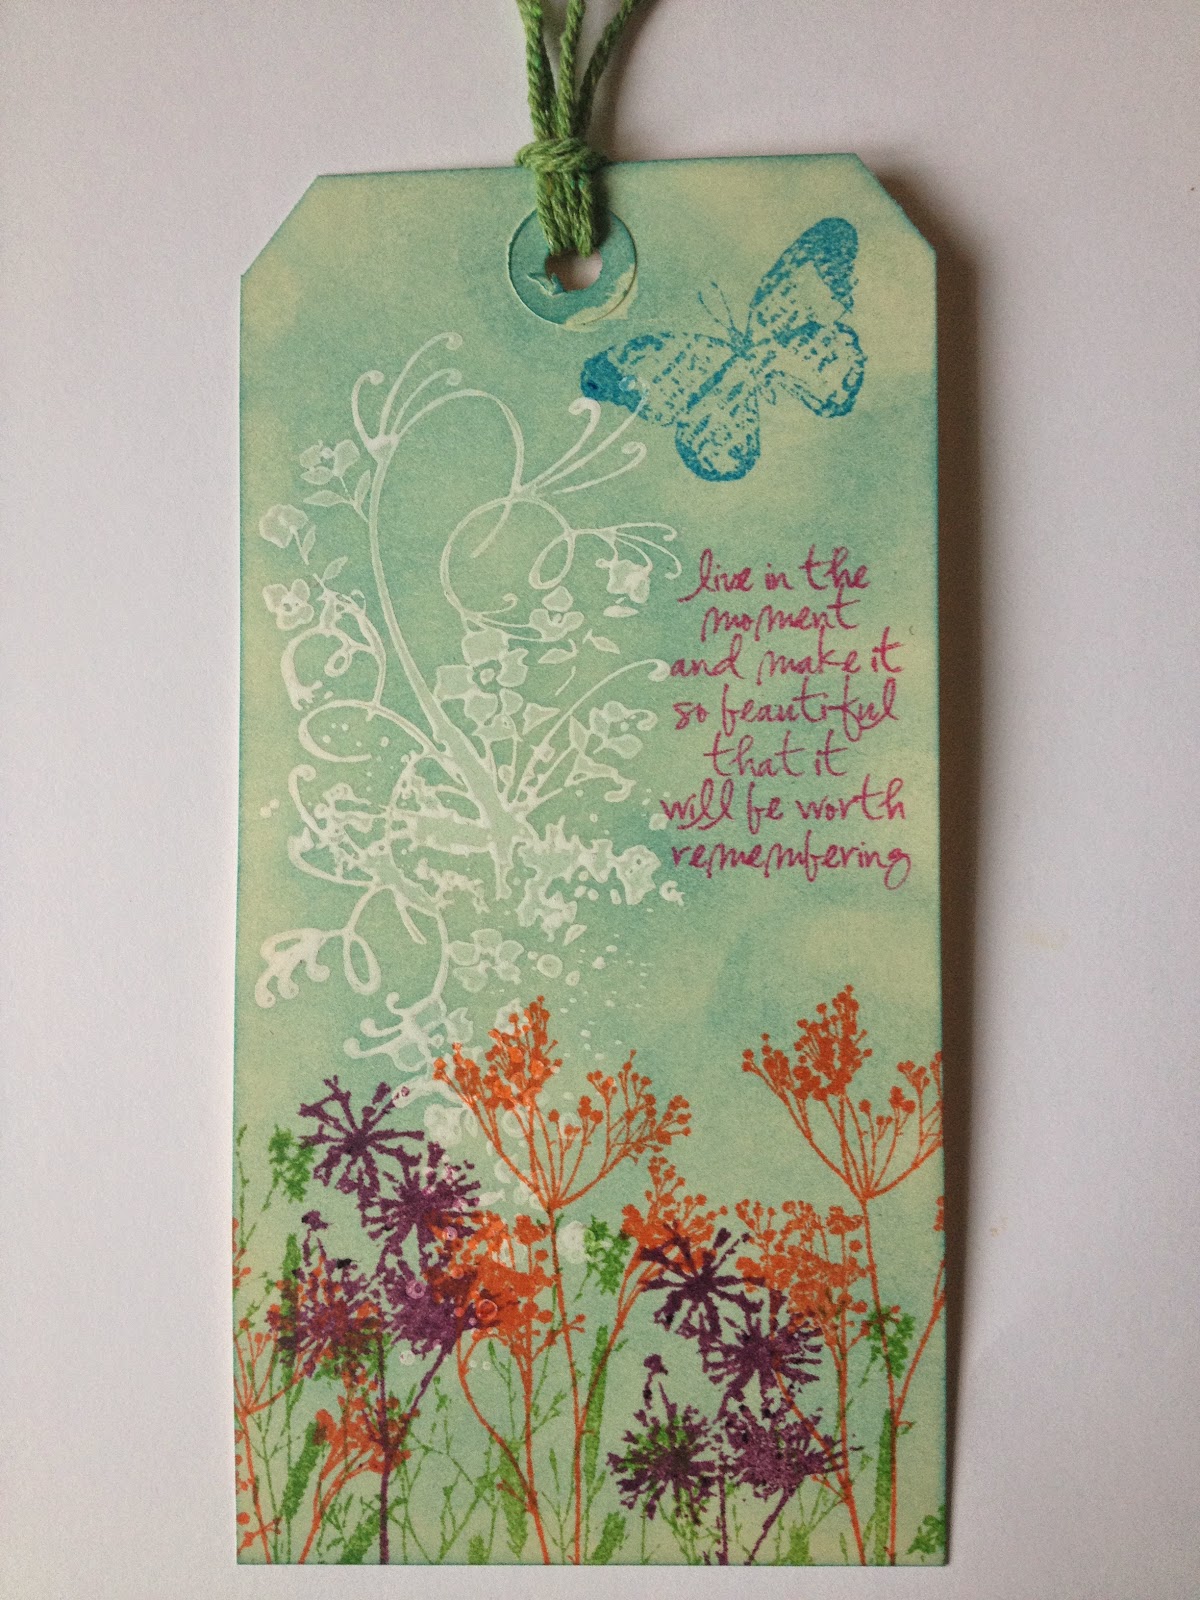
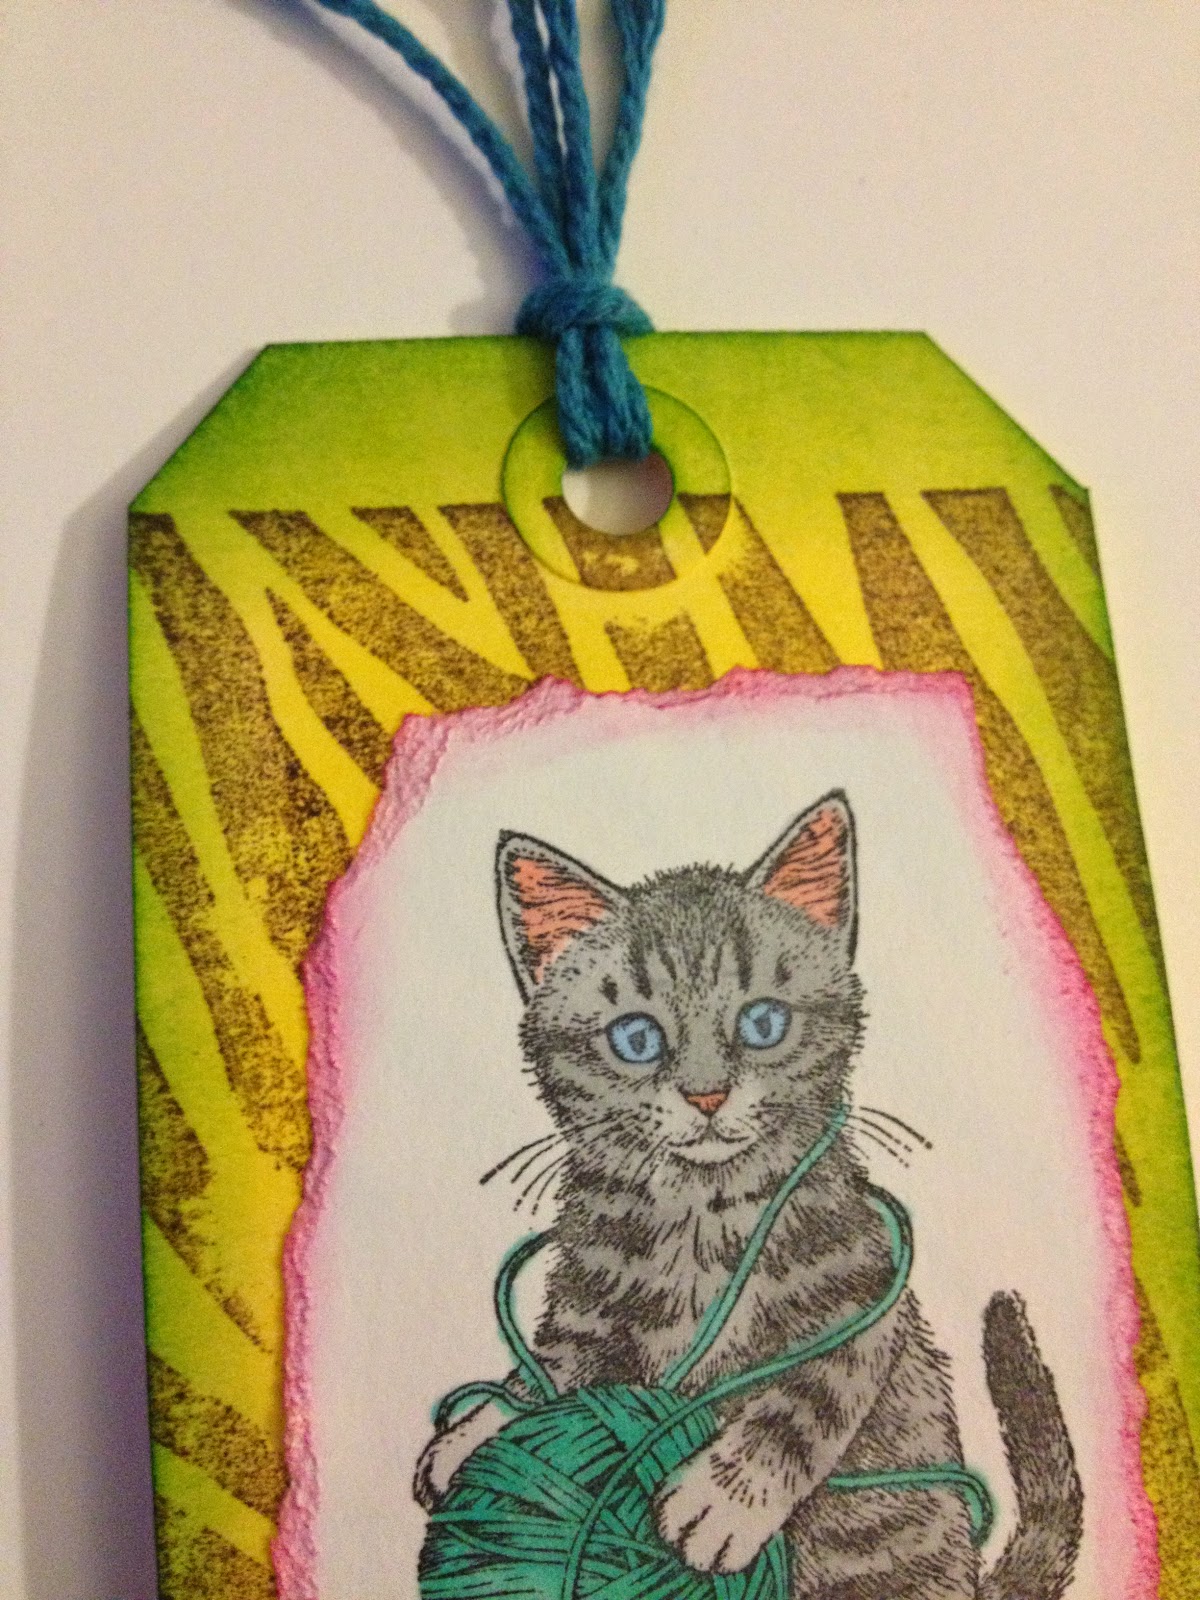
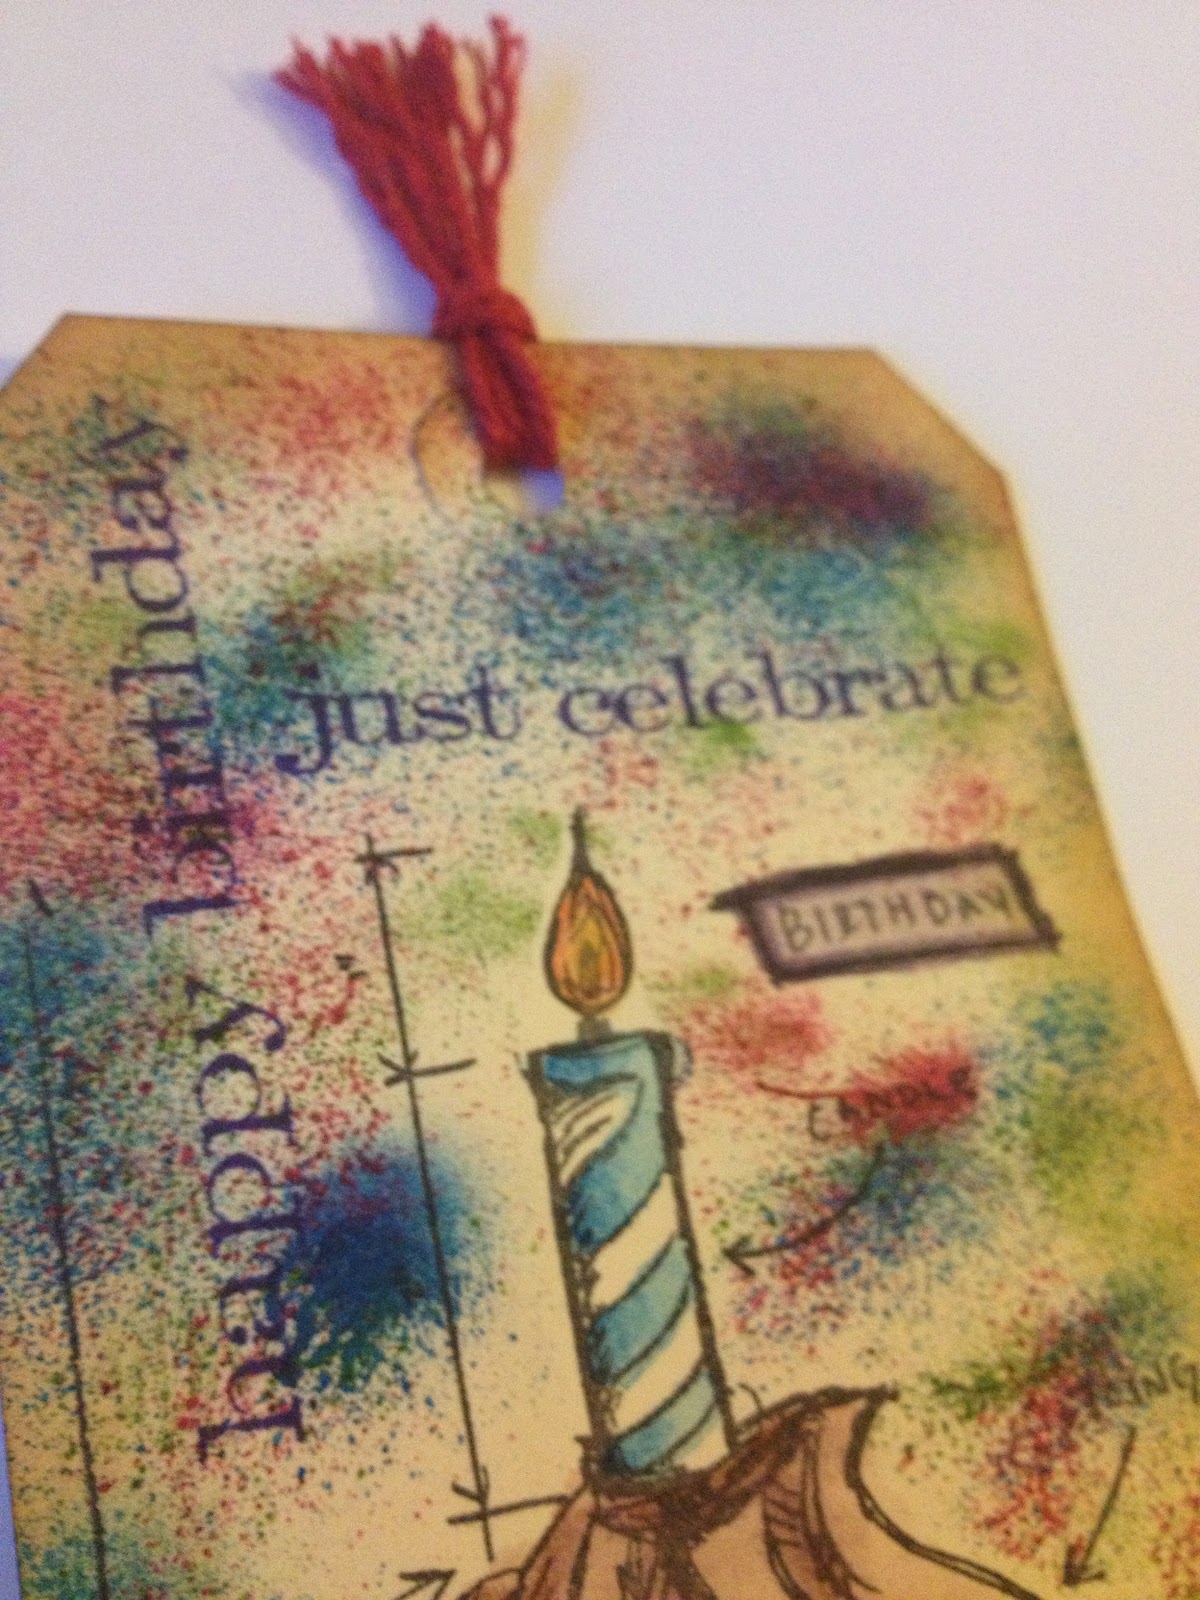
I started by covering my tag with Distress Stain and heating it to dry it.  I splattered some water droplets on it, again drying it, and then began to stamp some of my various train-themed stamps.  All of the stamps except the train were stamped with colors, and the train I stamped in black, to make it stand out. Once I was done stamping, I edged my card with Vintage Photo Distress ink, inked a Chit Chat sticker with a little Antique Linen, and added it to the tag.  Lastly, I cut a piece of the Maya Road twine cording, and ran a foam blending tool with some brown ink on it over it to make it look a little older and dingier, and tied it through the hole at the top.
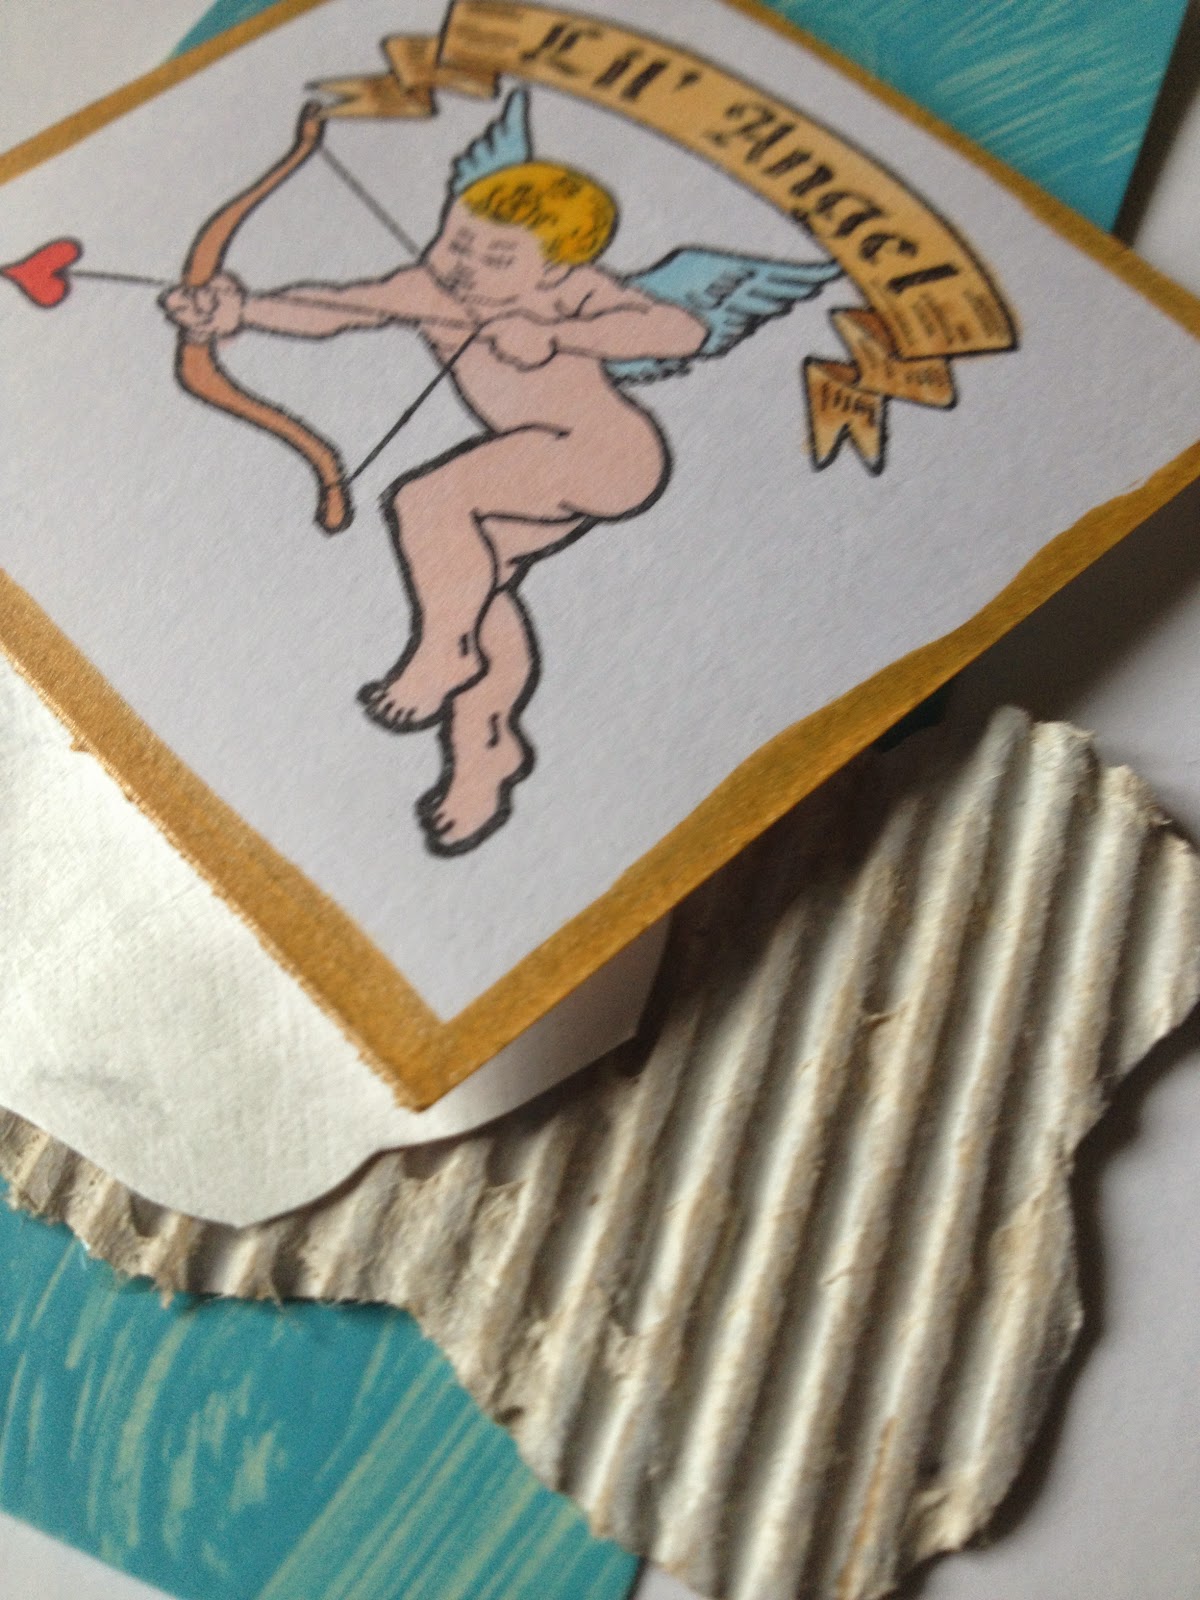
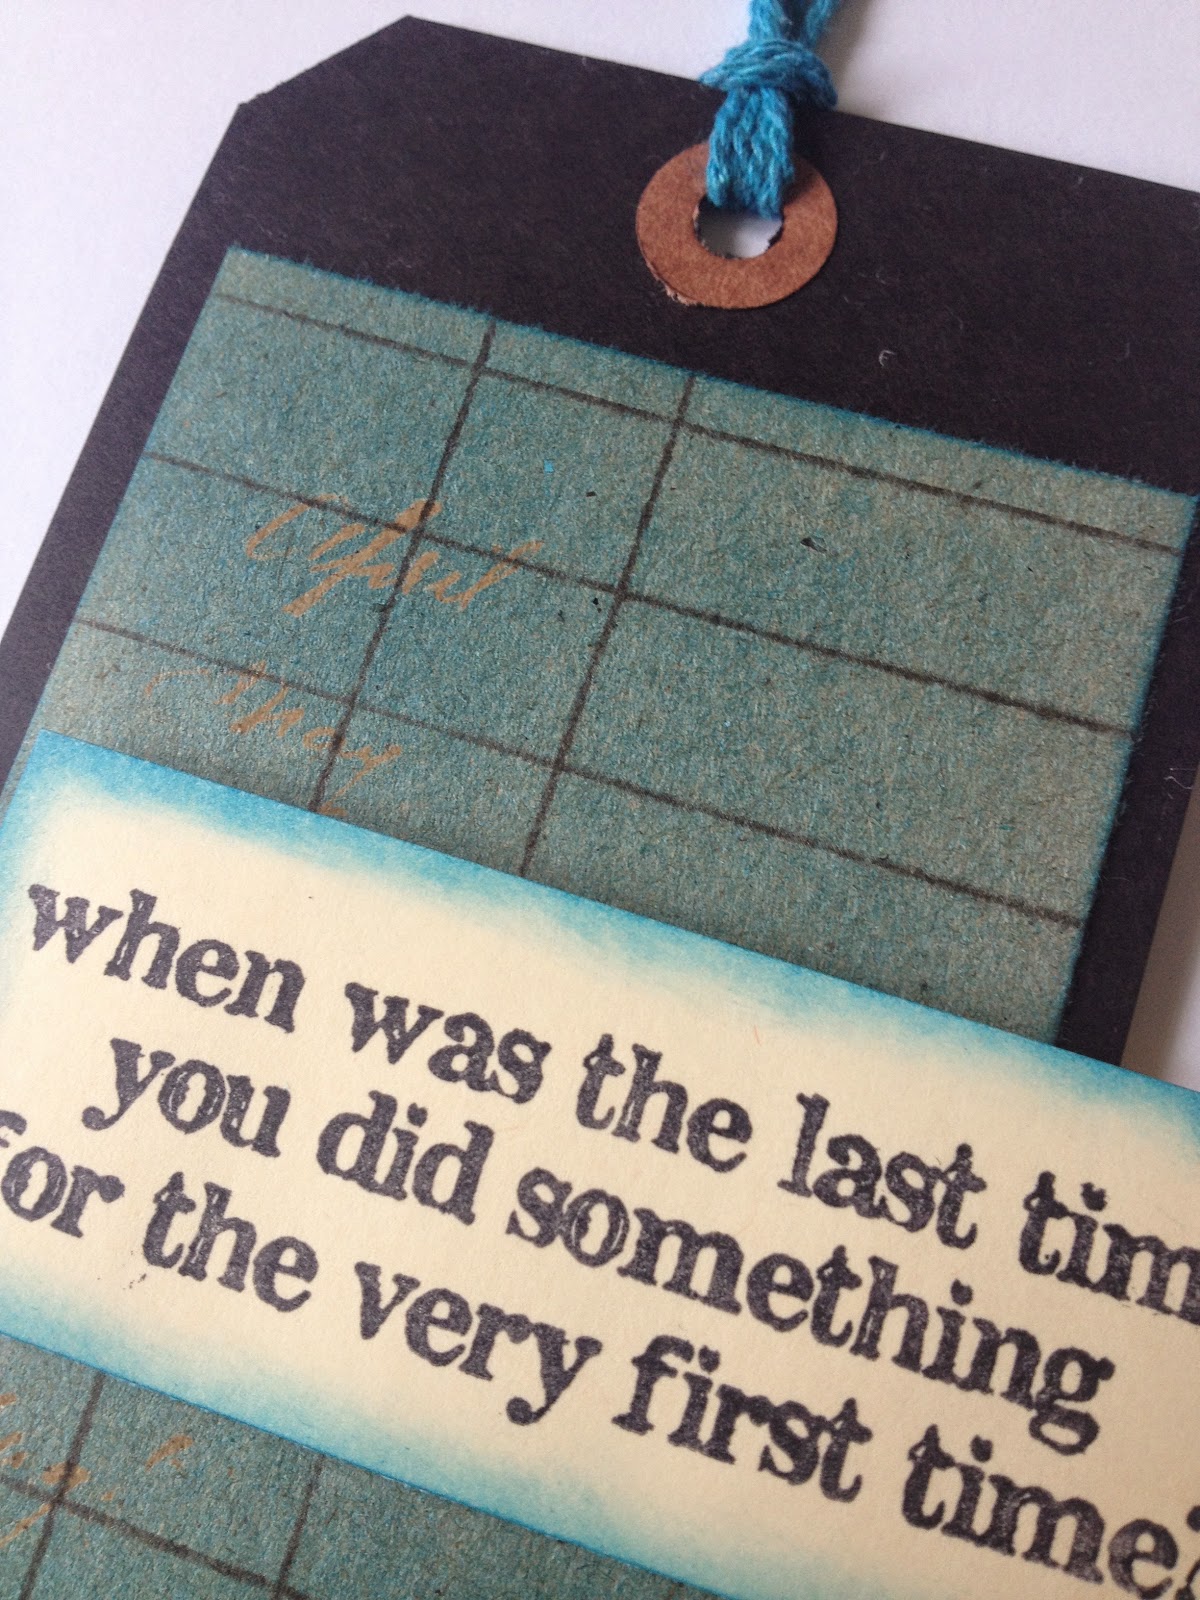
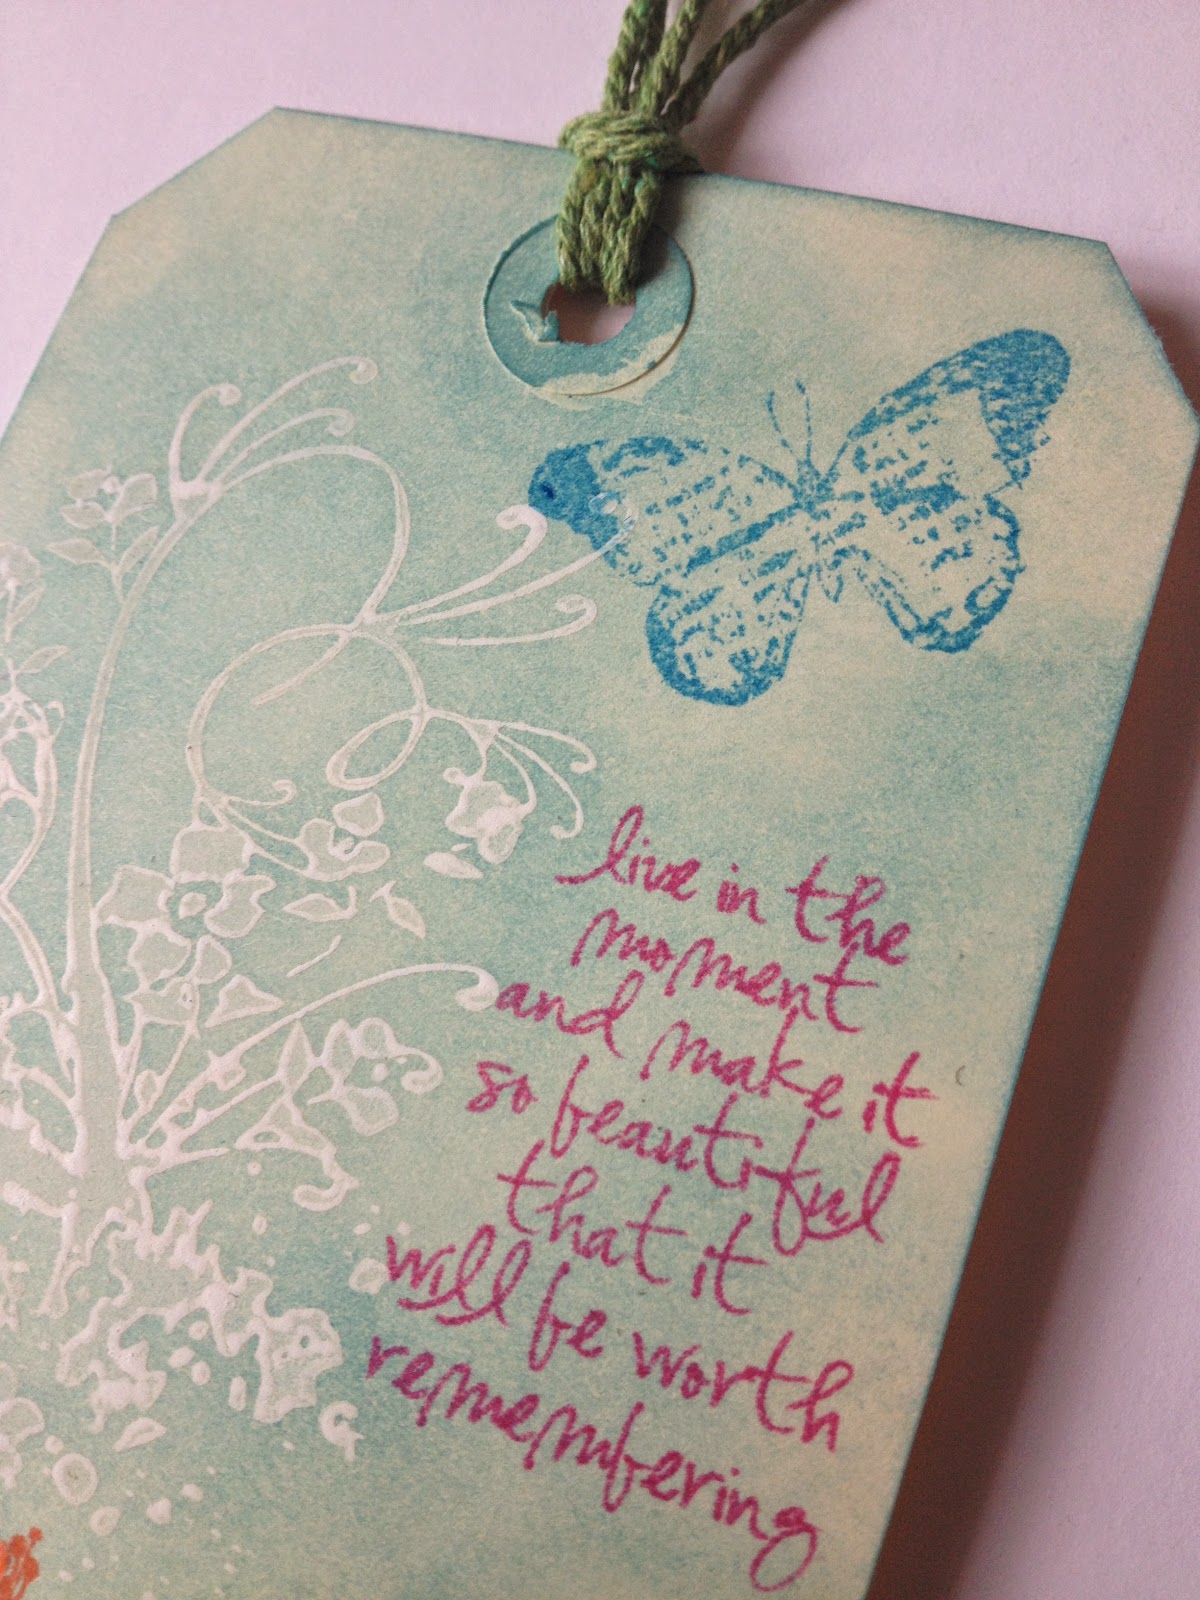
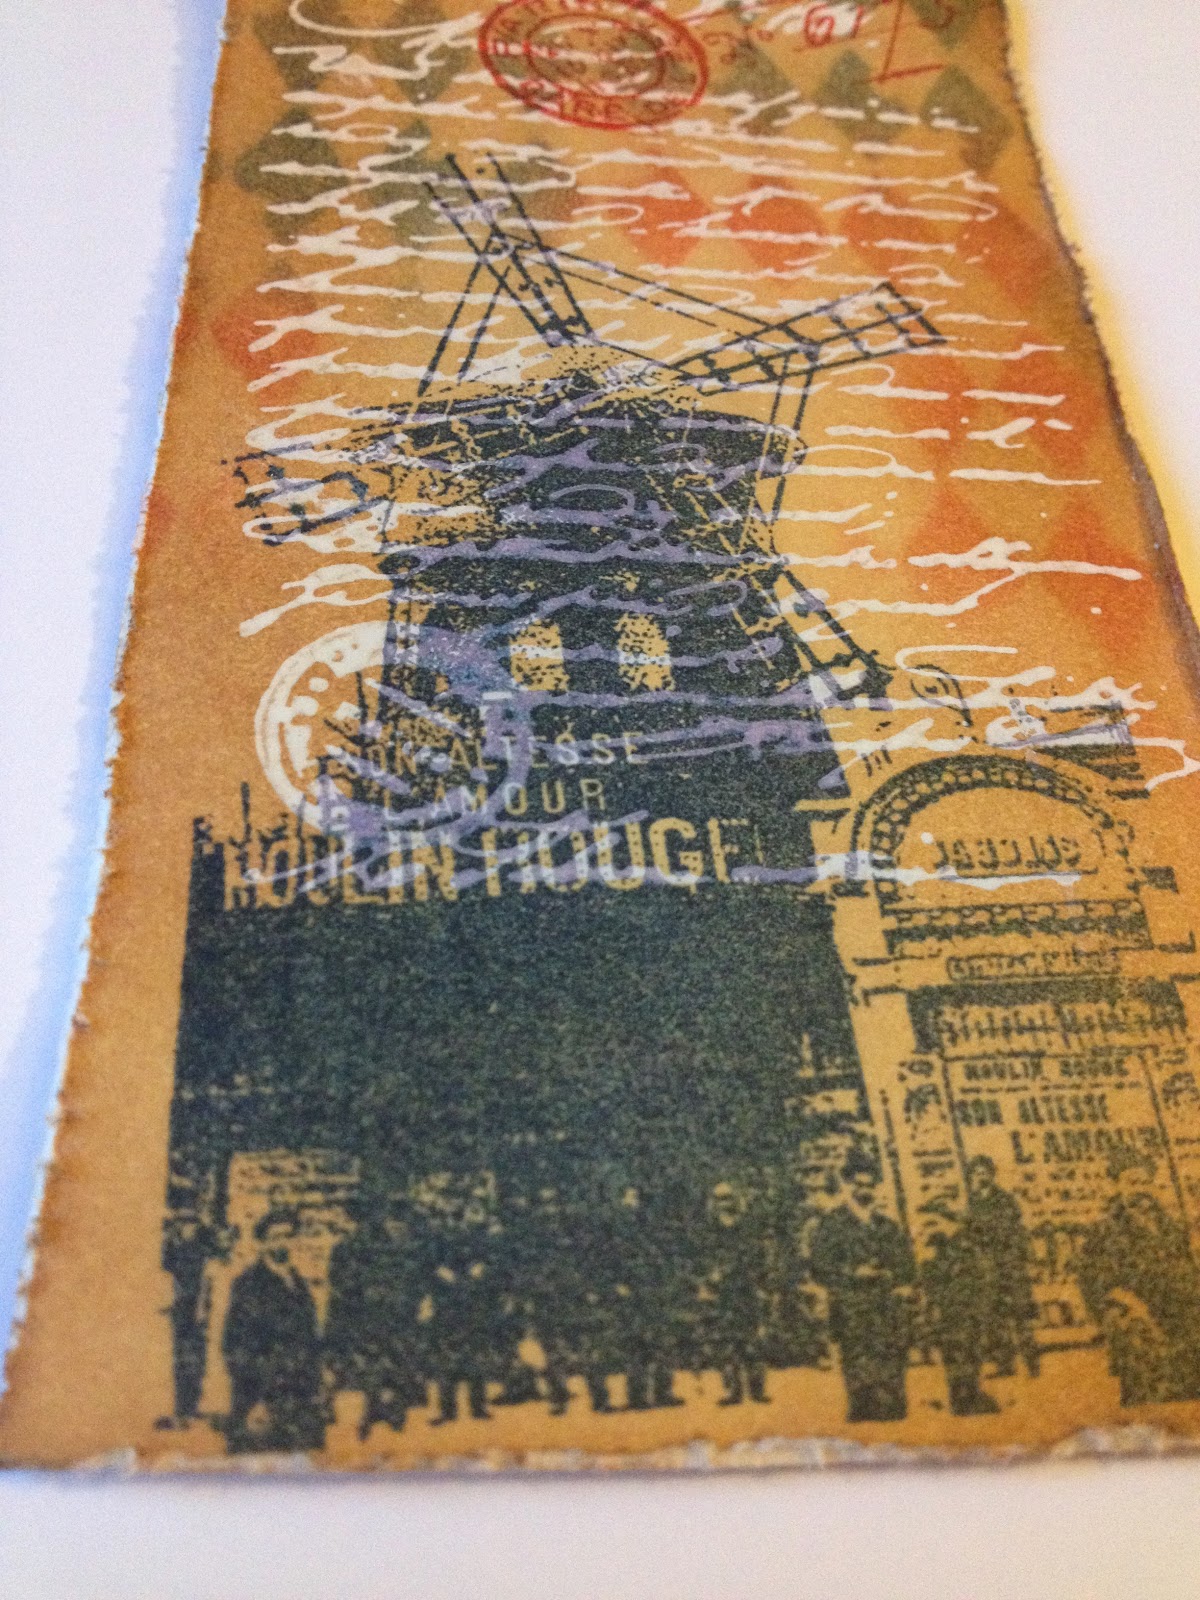
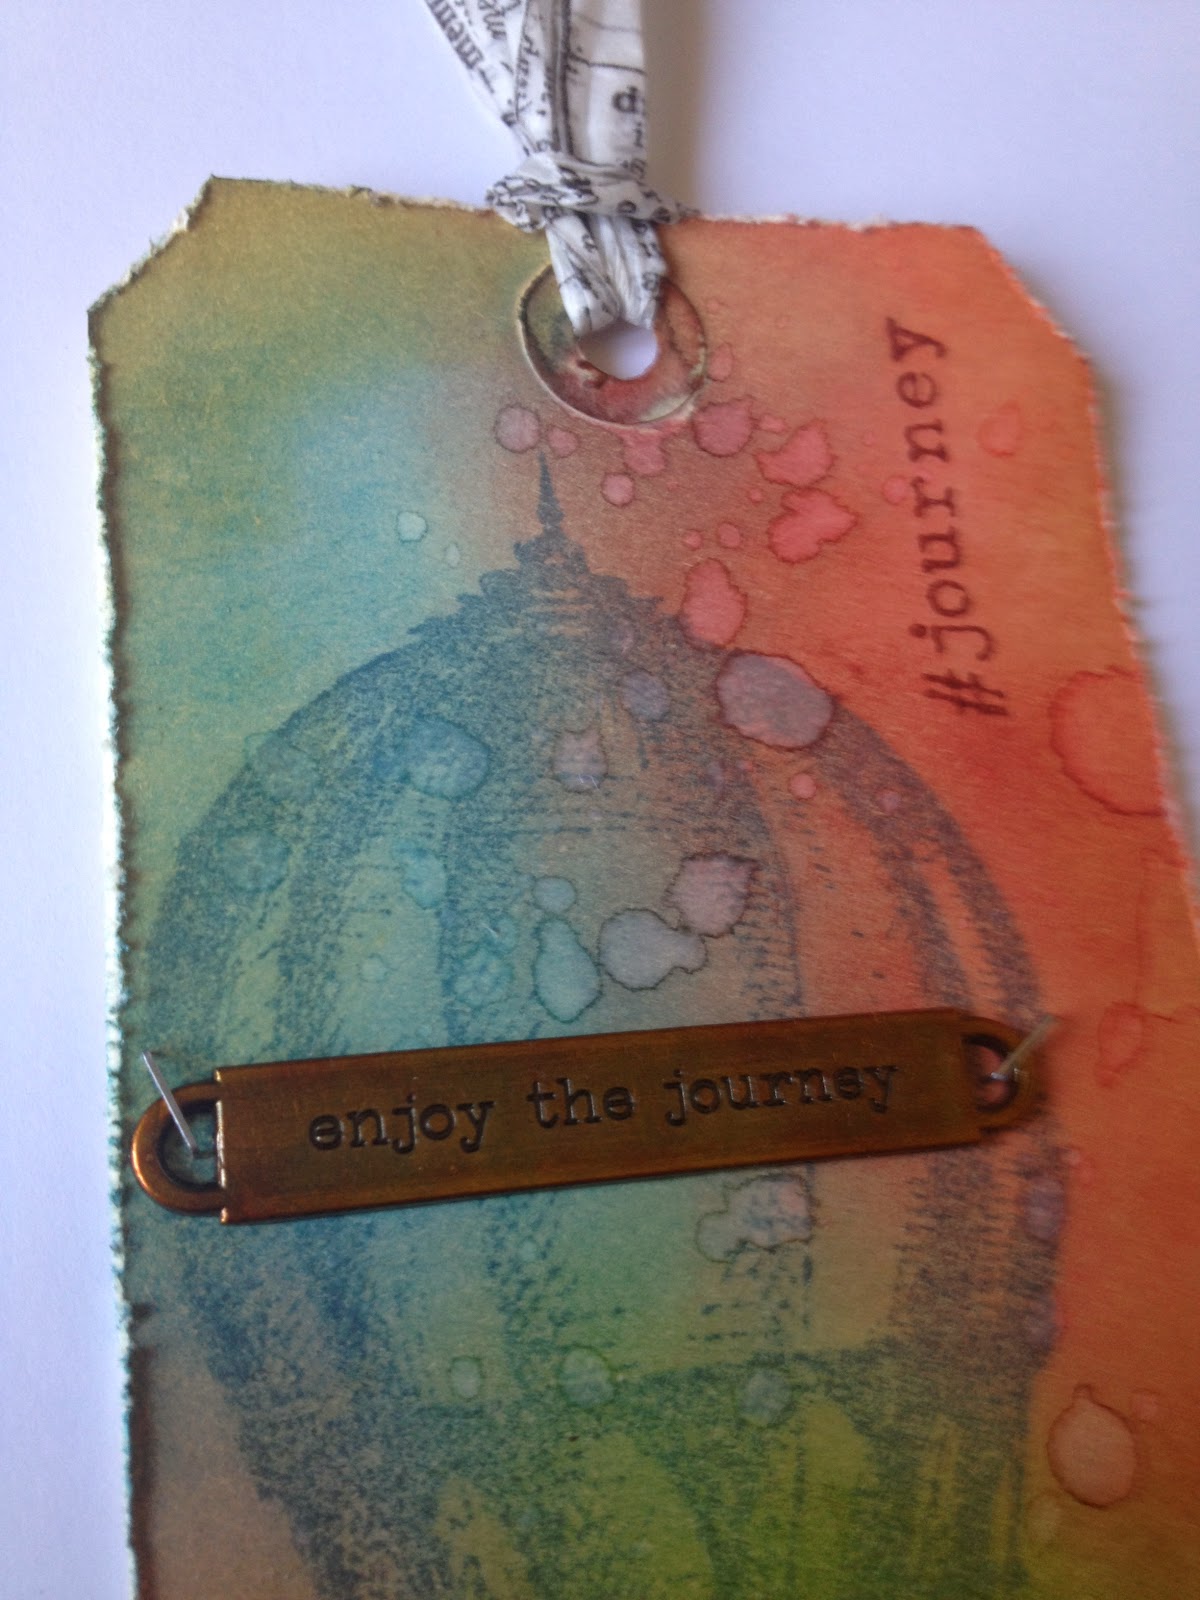
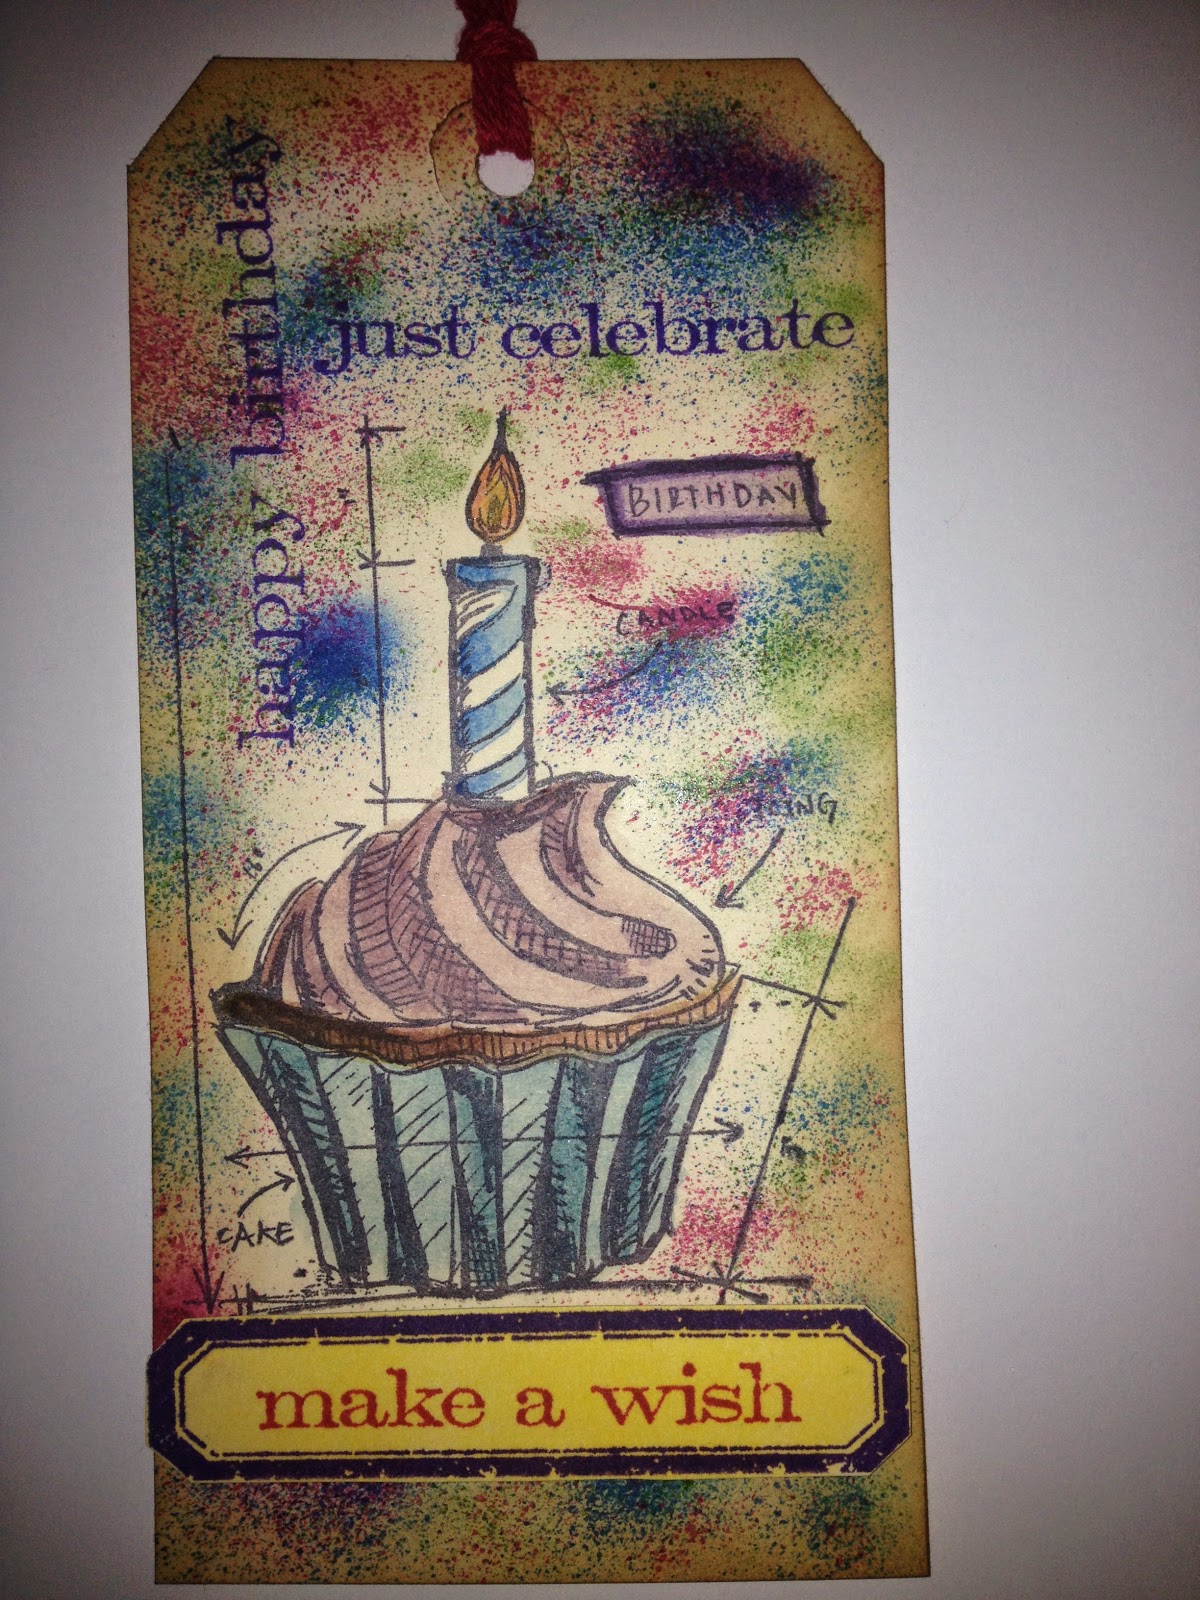
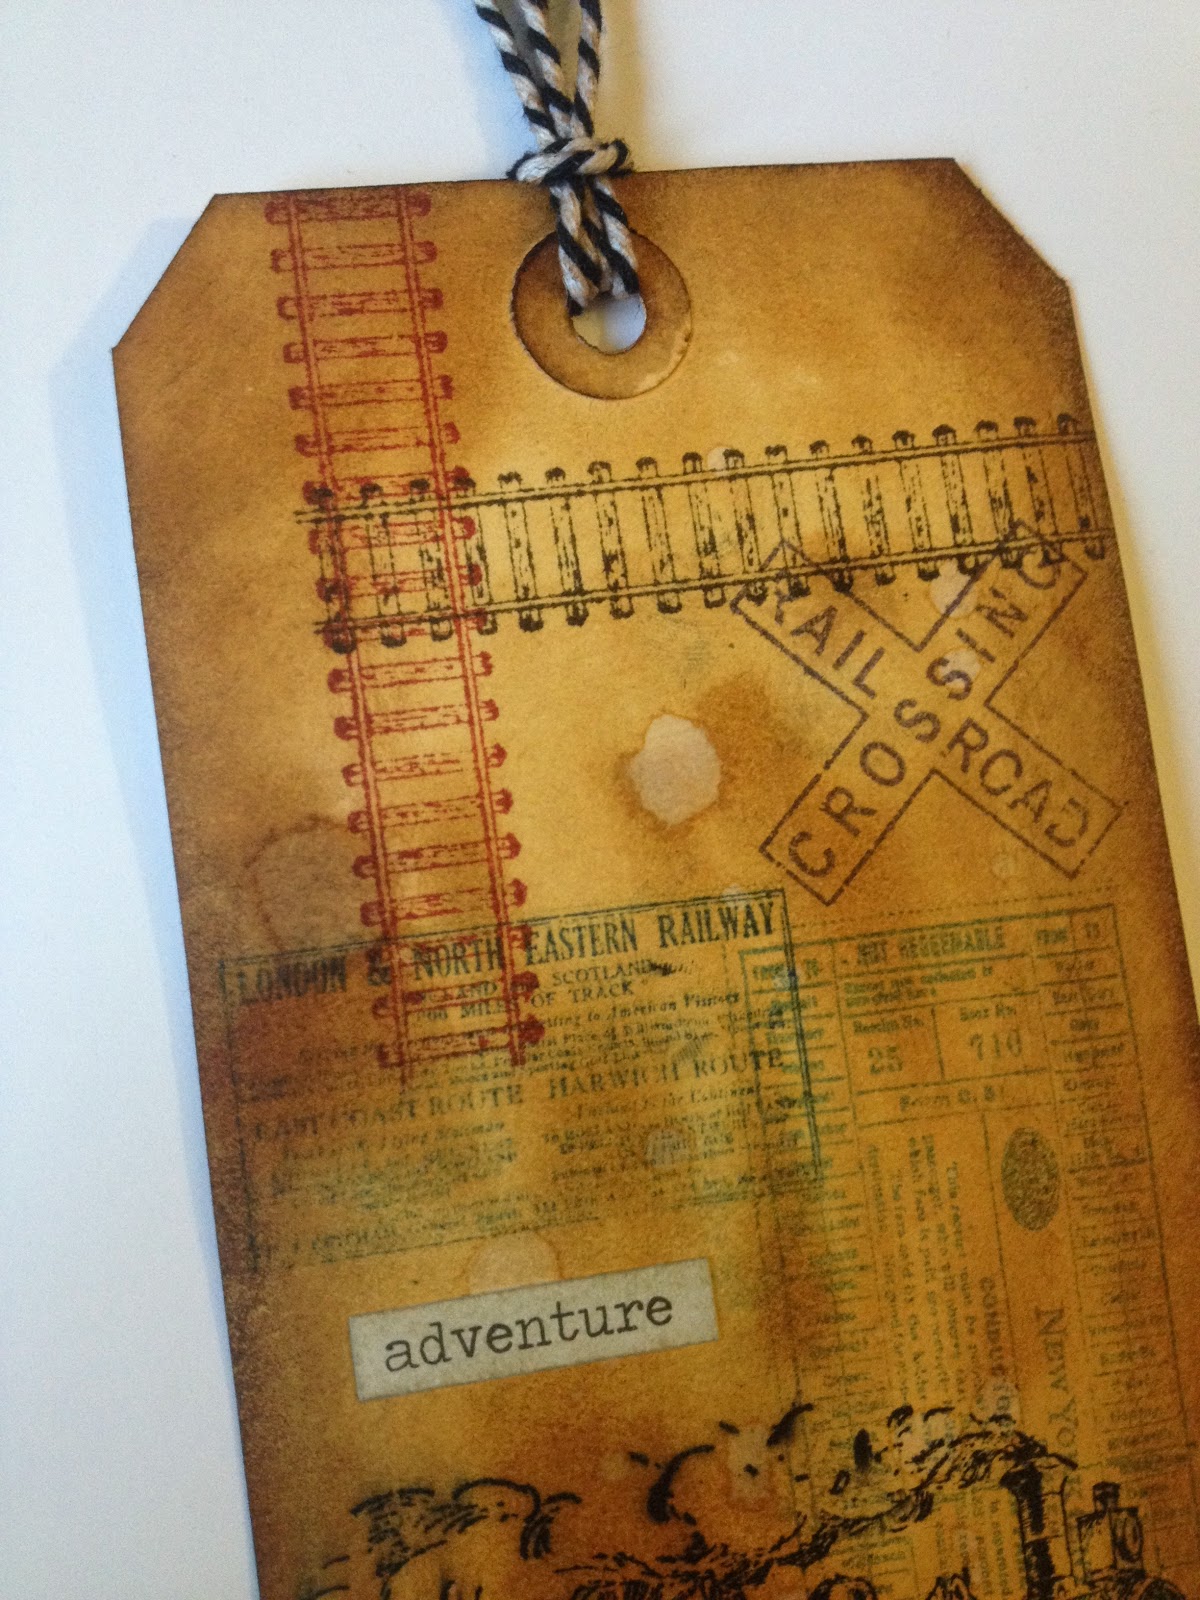
More views:


Well, I may be back before the end of the week, but this is definitely it for April's projects!  See you next month!

BAC


A Vintage Journey: Spring Flowers

Here we are with Part 2 (of 3) of my posts this evening.  :-)

This project was created for A Vintage Journey's Challenge #4 ("Spring Flowers"), and I'm also submitting it to SimonSaysStamp's Wednesday challenge ("Anything Goes").

Here's my tag:


Materials/tools used:
 - Ranger Inkssentials Manila tags
 - Ranger Distress Ink: Broken China, Bundled Sage, Dried Marigold, Iced Spruce, Mustard Seed, Ripe Persimmon, Salty Ocean, Vintage Photo
 - Ranger Distress Paint: Peeled Paint, Picket Fence
 - Ranger Distress Stain: Tea Dye
 - Ranger Heat Tool
 - Ranger Inkssentials Foam Blending Tool
 - Ranger Inkssentials Mister
 - Ranger Inkssentials Collage Glue Stick
 - Tim Holtz 8x8 Paper Stash: Collage, Menagerie
 - idea-ology: Crinkle Ribbon, Long Fasteners, Sanding Grip
 - Tonic Studios: Craft Scissors, Paper Distresser
 - Sizzix Big Shot
 - Sizzix dies: Tattered Florals Bigz, Tattered Leaves Bigz
 - Stamp by Tim Holtz for Stampers Anonymous: CSS30218
 - 1/8" hole punch

To create this tag, I started by putting some Tea Dye Distress stain and Peeled Paint Distress paint on my craft sheet, and swiping my tag through them until it was covered.  I dried it with my heat tool, and then covered it with Iced Spruce Distress ink.  Then I splattered some droplets of water on it, and dried once again with the heat tool.  I then inked around the edges with brown Distress ink, and distressed them with the Tonic distresser tool.  Next, I stamped my butterfly with white Distress paint, cleaned my stamp, and used my heat tool to dry the paint.

Next, I set the tag aside, and began working on my die cuts.  I cut pieces from four different pages in the paper stashes, and die-cut 4 sets of the Tattered Floral pieces, and 2 single leaves from the Tattered Leaves die.  I lightly sanded the edges, and then used my foam tool to add some color to my flower pieces.  Each flower above contains 2 sets of Tattered Floral pieces, but I mixed and matched the different paper designs for variety.  I used my tiny hole punch to make a hole in the centre of each flower piece, and began to put my flowers together, from the top down, on long fasteners.  I alternated rolling the petals inward or outward to create some dimension.  Once my flowers were complete, I attached the leaves to my tag with collage glue stick, and used some Glossy Accents to adhere the completed flowers.  Lastly, I took a piece of crinkle ribbon, spritzed it with water, rubbed a yellow Distress pad on it, crumpled it up, and dried it with my heat tool, for the perfect finishing touch on top.

More views:


Back in a little bit with my last post for this evening!  :-)

BAC


12 Tags of 2014: April

Wow!  My second year doing 12 Tags, and I'm already a third of the way through it!  :-)  Time flies!

I'm also sharing this project with A Vintage Journey ("Spring Flowers").


Materials/tools used:
 - Ranger Inkssentials Manila tags
 - Ranger Distress Ink: Iced Spruce, Milled Lavender, Mustard Seed, Shaded Lilac, Squeezed Lemonade, Vintage Photo, Walnut Stain
 - Ranger Distress Paint: Broken China, Peeled Paint
 - Ranger Glossy Accents
 - Ranger Matte Glue 'n' Seal
 - idea-ology: Crinkle Ribbon, Grungeboard, Jump Rings, Jute String, Mirrored, Philosophy Tags, Sanding Grip, Tissue Tape (Sketchbook, Symphony), Wire Pins
 - DCWV adhesive backed cork
 - Tim Holtz 8x8 Paper Stash: Menagerie
 - Ranger Heat Tool
 - Ranger Inkssentials Foam Blending Tool
 - Ranger Inkssentials Mister
 - Ranger Inkssentials Collage Glue Stick
 - Sizzix Big Shot
 - Sizzix dies: Tattered Pinecone Bigz, Trellis Frameworks
 - Tonic Studios Craft Scissors
 - Hot glue gun
 - Toothpicks, paper towels

I'm not going to devote a long post to what techniques I used.  My 12 Tags post is always based on inspiration from Tim Holtz's post, so head there for all the tips and techniques!  :-)

I will note that I was aready elbow-deep in project when I realized that what I was remembering as a jar of Multi-Medium, was in fact Glue 'n' Seal, so I wound up using that instead, to attach my trellis die cut, and it worked pretty well.  I put a heavy book on top of it for about 10 minutes, just to keep it in place and let it bond.  I used dots of Glossy Accents to adhere the center pieces into the trellis.

The technique for turning a tattered pinecone into a tea rose is cool, but takes some practice.  I did okay on the first rose (the yellow one), but then on the second (purple), when I was loosening and repositioning the petals, 2 of them separated, so that I basically had 2 spirals, instead of one.  It still came out okay, but I think I still need some practice making those.  :-) (Also, fun fact: the hot glue gun doesn't lie.  It's hot.)

More views:


I still have two more projects I completed for the end of April to share with you this evening, so check back in a little bit for installments 2 & 3.  :-)

BAC

Tuesday, April 29, 2014

Bombshell April Colour Challenge: Comfort Tones

Hello again!

Here's the second project I created for a Bombshell Stamps challenge this month.  This tag was created for the April Colour Challenge ("Comfort Tones").

These were the colours to match:


Here's my tag:


Materials/tools used:
 - Ranger Inkssentials Manila tags
 - Ranger Distress Ink: Brushed Corduroy, Evergreen Bough, Iced Spruce, Victorian Velvet 
 - Ranger Distress Stain: Evergreen Bough, Iced Spruce
 - Tsukineko Memento dye ink: Tuxedo Black
 - Copic Sketch markers: BG72, E23, R00, R02, R59, RV91, 0
 - Ranger Ice Stickles: Cherry Ice
 - idea-ology Crinkle Ribbon
 - Ranger Heat Tool
 - Ranger Inkssentials Foam Blending Tool
 - Ranger Inkssentials Mister
 - Bombshell Stamps "Bombshell Angel" stamp set
 - Tonic Studios Craft Scissors
 - Paper trimmer
 - White cardstock, double-stick tape, foam dots from my stash

I should start by noting that I kept as close to the suggested palette as possible, within the limits of the markers/ink I own.  (I wish I knew of a good method for matching Design Seeds palettes to the Copic colour chart.  If you know of one, please share it!)  :-)

I started by stamping my bombshell with Memento dye ink on white cardstock, and trimming to accommodate her.  I coloured her in with my Copics, and then used my foam tool to add some Victorian Velvet Distress ink around the edge of that piece.  I stamped the "Bombshell" word on another piece of cardstock, and again trimmed it down.  This piece was inked first with Iced Spruce, and then with Evergreen Bough, in an attempt to match the correct palette.  Then I inked the entire surface of a blank tag with Brushed Corduroy, and attached the stamped pieces.  The smaller word stamp was attached with foam dots, to add a little dimension.  Next, I added some dots with Ice Stickles for a little "bling".  Lastly, I cut a piece of crinkle ribbon, and  inked with a couple shades of Distress Stain, dried it with my Heat Tool, and added it to the top.

More views:


That's it for now, but I'll still have a couple projects to share tomorrow.  :-)

'Til then!

BAC

Bombshell April 2014 Challenge: Junk It!

Hello again!

Today I have the first of 2 posts highlighting projects I did for challenges at Bombshell Stamps this month.  Ms. April's challenge was "Junk It!", which encouraged participants to repurpose "junk" (mail, packaging, bottles, boxes, etc.) and use it in your design.

Here's my tag:


Materials/tools used:
 - Ranger Inkssentials #5 Manila tags
 - Ranger Distress Paint: Broken China, Picket Fence
 - Ranger Distress Stain: Tarnished Brass
 - Tsukineko Memento dye ink: Tuxedo Black
 - Ranger Glossy Accents
 - Copic Sketch markers: B00, E13, E35, R00, R24, Y15, Y19, Y32
 - idea-ology Crinkle Ribbon
 - Ranger Heat Tool
 - Ranger Inkssentials Mister
 - Bombshell Stamps "Bombshell Angel" stamp set
 - Tonic Studios Craft Scissors
 - Paper trimmer
 - White cardstock, foam dots from my stash
 - Tyvek envelope, cardboard mailer box reclaimed from recent mail

First of all, a great big THANK YOU!!! to my awesome friend Denise, who sent me my very first set of Bombshell stamps, so that I could keep joining challenges at Bombshell!!  Yay!!!!!

To create this tag, I started by covering my blank tag with Broken China Distress paint, and setting it aside to dry.  Next, I tore a flap off a corrugated cardboard Priority mail box that I received a package in earlier this month, and separated the top layer to expose the corrugation.  I cut it into a cloud shape, and covered it with Picket Fence Distress paint, again setting it aside to dry.  I also took a Tyvek mailing envelope I'd received, and also cut a cloud shape from that.  Next I cut a piece of white cardstock approximately 2.5" square, and stamped the angel stamp with Tuxedo Black Memento ink.  (This is definitely my "go-to" ink when I'm going to colour with Copics.  It doesn't react or move at all!)  I coloured the angel in, and then carefully edged the card with the brass Distress Stain (right from the dabber top).  I looked at my tag and the piece of cardboard, and they weren't *quite* dry yet (and I'm impatient!), so I quickly finished drying them with my heat tool.  I used Glossy Accents to attach my clouds, and then foam dots to add the piece with the angel.  Lastly, I cut a piece of crinkle ribbon, misted it with water, crumpled it, and dried it, before attaching it at the top.

More views:


This is just the first of 2 challenges I'm joining at Bombshell in April, so check back in a little bit for the other one! 

'Til then!

BAC


Monday, April 28, 2014

Simon Wednesday Challenge: Simon Says Keep It Clean and Simple

Last project!  (For now...) ;-)

This project was created for SimonSaysStamp's Wednesday challenge ("Simon Says Keep It Clean and Simple").  There was also an optional extra challenge to use one layer.  :-)

Here's my tag:


 - Ranger Inkssentials Black tags
 - Ranger Inkssentials Manila ATC blanks
 - Ranger Distress Ink: Salty Ocean
 - Ranger Archival Ink: Jet Black
 - Tim Holtz Kraft Resist Paper Stash
 - Maya Road Twine Cording Solids: Blue Raspberry
 - Ranger Inkssentials Foam Blending Tool
 - Tonic Studios Craft Scissors
 - Stamp by Tim Holtz for Stampers Anonymous: CMS165
 - Paper trimmer
 - Double-stick tape, foam dots from my stash

This tag was really quick and simple to make.  :-)  I cut a piece of the Kraft Resist paper to fit on the tag, and inked over it with the Distress ink and my foam blending tool.  This brought out the areas of resist already on the paper.  I took an ATC blank, stamped my sentiment, and trimmed off the excess part of the card.  Inked around the edges of the card with the same colour I used on the background.  Attached the Kraft Resist to my tag with double-stick tape, and added the piece with the sentiment with foam dots, to create my added layer.  Twine cording through the hole at the top of the tag, and I was done!

Additional views:


Back to the studio with me!  As the month comes to an end, I'm finishing up a lot of projects, so expect a few more posts before April escapes for good.

'Til then!

BAC


Simon Work It Wednesdays: Spring/Bright Colours

...Aaaand we're back!  (Though somewhat delayed from the original posting plan - oops!)

This project was created for SimonSaysStamp's Work It Wednesdays ("Spring/Bright Colours").  I'm also submitting it to A Vintage Journey ("Spring Flowers"), and Inspiration Journal ("A Few of My Favourite Things").

Here's my tag:


Materials/tools used:
 - Ranger Inkssentials Manila tags
 - Ranger Distress Ink: Broken China, Mowed Lawn, Picked Raspberry, Ripe Persimmon, Salty Ocean, Seedless Preserves
 - Ranger Distress Paint: Picket Fence
 - Ranger Heat Tool
 - Ranger Inkssentials Foam Blending Tool
 - Maya Road Twine Cording Solids: Lime Green
 - Tonic Studios Craft Scissors
 - Stamps by Tim Holtz for Stampers Anonymous: CSS27836, CSS30218

To create this tag, I first stamped the largest flower stamp with white Distress paint (taking care to immediately clean my stamp off before the paint dried!), and then dried the paint with my heat tool.  Next, I used my foam tool to ink the entire tag with Broken China Distress ink, to give the impression of sky.  I stamped up 3 different flower stamps at the bottom several times, each with a different colour.  I stamped my butterfly and sentiment also, and then finished with some twine cording at the top.

More views:


Back in a little bit, with the third and final project from this past weekend!  :-)

Sunday, April 27, 2014

Simon Monday Challenge: Big Stamp

Hello everyone!  It's been a busy weekend, and I have a trifecta of posts for you today.  So let's get started!  :-)

This tag was created for SimonSaysStamp's Monday challenge ("Big Stamp").  Here's my tag:


Materials/tools used:
 - Ranger Inkssentials Manila tags
 - Ranger Distress Ink: Mowed Lawn, Peacock Feathers, Salty Ocean, Vintage Photo
 - Archival Ink: Deep Purple
 - idea-ology Jute String
 - Ranger Heat Tool
 - Ranger Inkssentials Foam Blending Tool
 - Ranger Inkssentials Mister
 - Stamp by Tim Holtz for Stampers Anonymous: CMS165
 - Tonic Studios: Craft Scissors, Paper Distresser

To create this tag, I selected 3 shades of Distress: a blue, a green, and an aqua, and inked all over my tag with my blending tool.  I spritzed water from my Mister, and flicked it over the tag in droplets, and dried them with my heat tool.  I stamped my sentiment (yup, all of that great advice is on one big stamp!) with Archival ink, and edged around my tag with a brown Distress shade to bring all the colours together.  I distressed the edges with my Tonic tool, and added some jute string at the top.

More views:


Be sure to check back a little later for projects #2 and #3!  :-)

BAC

Tuesday, April 22, 2014

Simon Wednesday Challenge: Simon Says Animal Antics

Hello again!

This tag was created for SimonSaysStamp's Wednesday challenge ("Simon Says Animal Antics"), and will also be submitted to SimonSaysStamp's Monday challenge ("Big Stamp"), and Inspiration Journal's April challenge ("A Few of My Favourite Things").  :-)

Here's my tag:


Materials/tools used:
 - Ranger Inkssentials #5 Manila tags
 - Ranger Distress Ink: Dusty Concord, Mowed Lawn, Picked Raspberry
 - Ranger Distress Stain: Squeezed Lemonade
 - Tsukineko Memento dye ink: Tuxedo Black
 - Copic Sketch markers: B32, BG13, N0, N2, N4, RV42
 - idea-ology Label Letters
 - Maya Road Twine Cording Solids: Blue Raspberry
 - Ranger Heat Tool
 - Ranger Inkssentials Foam Blending Tool
 - Tonic Studios Craft Scissors
 - Stamps by Inkadinkadoo (Kitten), and Recollections (Zebra/Tiger stripe)
 - White cardstock, double-stick tape from my stash

I have a LOT of animal stamps, mostly ones I've carved, but when I saw the topic for this challenge, I *knew* I wanted to use this kitten stamp.  I picked it up several months ago to use on some ATCs, and I just LOVE it!  

So I stamped it with the Memento dye ink onto a piece of white cardstock (actually an ATC blank - I keep a bunch pre-cut on my work table), and once it was dry, I coloured it in with my Copics.  I thought about doing the tiger-stripe background in more "natural" colours, but decided to keep it fun and playful.  I covered a blank tag with Distress stain, dried it with my heat tool, and then stamped up my background stamp over it.  (If memory serves, that stamp was originally sold as zebra print, but I've only ever used it as tiger print, so...)  ;-)  I inked around the edges of the tag, and set it aside.  I ripped the excess white cardstock off around my kitten stamp to create a little texture, and again inked around the edges with more Distress ink.  Attached it to the tag, added my sentiment with the label letters at the bottom, some twine cording at the top, and I was done!

More views:


'Til next time!

BAC

Sunday, April 20, 2014

Simon Monday Challenge: Winged Things

Hello everyone!

Today's project is for SimonSaysStamp's Monday challenge ("Winged Things"), and will also be submitted to SimonSaysStamp's Wednesday challenge ("Animal Antics"), and Inspiration Journal's April challenge ("A Few of My Favourite Things").

Here's my tag:


Materials/tools used:
 - Ranger Inkssentials Manila tags
 - Ranger Distress Ink: Chipped Sapphire, Faded Jeans, Peacock Feathers, Vintage Photo
 - Ranger Distress Stain: Broken China
 - Ranger Archival Ink: Jet Black
 - Ranger Alcohol Ink: Bottle, Denim, Purple Twilight, Sailboat Blue
 - Ranger Metallic Mixatives: Gold
 - Ranger Alcohol Ink Blending Solution
 - idea-ology: Adage Tickets, Sanding Block
 - Core'dinations Distress Cardstock: Walnut Stain
 - Maya Road Twine Cording: Blueberry
 - Ranger Heat Tool
 - Ranger Inkssentials Foam Blending Tool
 - Ranger Alcohol Ink Felt
 - Ranger Collage Glue Stick
 - Tonic Studios: Craft Knife, Craft Scissors
 - Sizzix Big Shot
 - Sizzix Autumn Gatherings die
 - Stamps by Tim Holtz for Stampers Anonymous: CMS167, CSS25870, CSS25887
 - Self-healing cutting mat
 - White glossy cardstock, foam dots from my stash

I took my inspiration for this tag from some of the birds we see in our backyard.  At a distance, they look black, but when the light hits them right, you see blues and greens and purples - beautiful!

I started by covering my tag with Distress stain, and drying it quickly with my heat tool.  I stamped the smaller bird stamps with Distress ink, and then set the tag aside.  I took a piece of white glossy cardstock, and began to build up a couple of layers of alcohol ink on it, with dots of each of my colours all on the same piece of felt, and periodically using a little blending solution.  Once I had a result I liked, I let it dry, and then stamped my raven stamp on top of it with Archival ink.  (I don't know what it is about that blueprint raven, but I love how it looks stamped over alcohol inks!)  I dried the Archival, and then fussy-cut the raven out.  Using my craft knife and a self-healing mat, I carefully cut out the space between the raven's legs.  (Never use a blade on a non-stick craft sheet!!!)  I wanted the suggestion of a nest, so I ran some brown Distress cardstock through my Big Shot with the Autumn Gatherings die, and used the twig pieces (the leaves, etc. will get set aside for a future project). :-)  I lightly sanded the twigs, and then inked over them with Vintage Photo Distress ink.  I considered using my Xyron to adhere them, but then decided against it because I knew I want pieces hanging off the edge on either side, and didn't want adhesive on the back of those pieces, so I used glue stick instead.  I have to admit, it's not a product I remember to use frequently.  My past experiences with glue stick have not been fabulous.  But Ranger's collage glue stick holds extremely well, and allows me to add adhesive only in certain areas.  After I glued the twigs and the bird, I inked around the edges of an Adage ticket, and added it with foam dots for a little dimension.  Some twine cording at the top, and I was done!

More views:


Well, that's it for now!  'Til next time!

BAC

Wednesday, April 16, 2014

A Vintage Journey: A Little Bit French

Hello again!

Today's tag was created for A Vintage Journey's Challenge #3 ("A Little Bit French").  I'm also submitting it to Inspiration Journal's April challenge ("A Few of My Favourite Things").

Here's my tag:


Materials/tools used:
 - Ranger Inkssentials Manila tags
 - Ranger Distress Ink: Antique Linen, Faded Jeans, Fired Brick, Tea Dye, Vintage Photo
 - Ranger Distress Paint: Picket Fence
 - Ranger Archival Ink: Cobalt, Vermillion
 - Ranger Heat Tool
 - Ranger Inkssentials Foam Blending Tool
 - idea-ology Tissue Tape: Nostalgic
 - Tonic Studios Paper Distresser
 - Tim Holtz for Stampers Anonymous Layering Stencil: Harlequin
 - Stamps by Tim Holtz for Stampers Anonymous: CMS071*
 - Painter's tape

* A note about stamp set CMS071: When I first ordered this set a few weeks ago, I did so specifically for the Moulin Rouge stamp you see on my tag.  Imagine my surprise when that set arrived, and the stamp had been replaced by another.  After doing a little checking around, it turned out that the composition of that set was changed within the last few years due to a copyright issue.  HUGE props to my amazing boyfriend, who managed to find one of the older sets in a corner of the Internet!  :-)  But if you purchase this set online, looking for the Moulin Rouge stamp, best to contact the seller directly to be sure it's the older set.  Don't just go by the product picture on the website.

This tag combines 2 of my absolute favourite things: Moulin Rouge and Distress!  :-)  I kept my palette to reds and blues for France, and the browns of Distress.  I started by stamping the script stamp with Picket Fence Distress paint, and drying it with my heat tool.  (Be sure to clean your stamp off before the paint dries on it.  Plain water works beautifully!)  Then I blended Antique Linen & Tea Dye Distress inks over it.  I stamped the Moulin Rouge stamp and the postmark with Archival ink, and then used painter's tape to secure the Harlequin stencil in place of the tag.  I inked over the stencil in various areas with the Fired Brick and Faded Jeans, and then removed the stencil and inked all over the tag with the Tea Dye again.  I blended in some Vintage Photo around the edges, and distressed them with my paper distresser tool.  I tore a length of tissue tape, folded it in half, crumpled it a bit, and used it to finish the tag at the top.  Et voila!  Notice how the Distress paint will resist the Distress ink over it, but allows for Archival stamping.  :-)  Cool effect, huh?

More views:


Well, that's it for tonight!  'Til next time!

BAC

Tuesday, April 15, 2014

Simon Wednesday Challenge: Happy Easter and/or Sweet Treats

Hello again!

Just a quick project today for SimonSayStamp's Wednesday challenge ("Happy Easter and/or Sweet Treats").  I'm also submitting this to Inspiration Journal's April challenge ("A Few of My Favourite Things").

Here's my tag:


Materials/tools used:
 - Ranger Inkssentials #5 Manila tags
 - Ranger Distress Ink: Worn Lipstick
 - Ranger Distress Stain: Mowed Lawn, Salty Ocean, Shaded Lilac, Squeezed Lemonade
 - Maya Road Twine Cording Solids: Lime Green
 - Ranger Heat Tool
 - Sizzix Big Shot
 - Quickutz Candy Bunny die
 - Sentiment printed on computer
 - White cardstock, double-stick tape, foam dots from my stash

This project seemed like the perfect excuse to use my candy bunny die (which looks suspiciously like a Peeps bunny!).  :-)  Because that die is on the small side, I sized down the entire tag, and worked on a #5, rather than my usual #8.  Pretty simple project, but I think it turned out super cute!

Well, that's it for now. 'Til next time!

BAC

Sunday, April 13, 2014

Simon Monday Challenge: Journey

Hello again!

Quick project today for SimonSaysStamp's Monday challenge ("Journey").  Also submitting to Inspiration Journal's April challenge ("A Few of My Favourite Things").

Here's my tag:


Materials/tools used:
 - Ranger Inkssentials Manila tags
 - Ranger Distress Ink: Aged Mahogany, Brushed Corduroy, Fired Brick, Mowed Lawn, Salty Ocean, Seedless Preserves, Stormy Sky
 - Ranger Archival Ink: Deep Purple
 - Ranger Alcohol Ink: Sunset Orange, Sunshine Yellow
 - idea-ology: Tiny Attacher, Tissue Tape (Symphony), Word Bands
 - Ranger Heat Tool
 - Ranger Inkssentials Mister
 - Ranger Inkssentials Foam Blending Tool
 - Ranger Alcohol Ink Felt
 - Tonic Studios Paper Distresser
 - Stamps by Tim Holtz for Stampers Anonymous: CMS183, CSS27843, CSS31703

This was a quick and fun project with some of my fave Ranger/Distress products, and basic techniques.  :-)

Additional views:


That's it for now, but I expect to have another project for you tomorrow!  :-)

'Til then!

BAC

Wednesday, April 9, 2014

Simon Wednesday Challenge: Simon Says Happy Birthday!

Hello all!

This project was created for SimonSaysStamp's Wednesday challenge ("Simon Says Happy Birthday"), and I'm also submitting it to Inspiration Journal's April challenge ("A Few of My Favourite Things").  :-)

Here's my take on a birthday tag:


Materials/tools used:
 - Ranger Inkssentials Manila tags
 - Ranger Distress Ink: Squeezed Lemonade, Vintage Photo
 - Ranger Distress Markers: Brushed Corduroy, Dusty Concord, Mowed Lawn, Mustard Seed, Peacock Feathers, Picked Raspberry, Ripe Persimmon, Salty Ocean, Victorian Velvet, Vintage Photo
 - Ranger Archival Ink: Deep Purple, Jet Black, Vermillion
 - Maya Road Twine Cording Solids: Cherry Red
 - Ranger Heat Tool
 - Ranger Distress Marker Spritzer
 - Ranger Inkssentials Blending Foam
 - Tonic Studios Craft Scissors
 - Waterbrush: Detailer and Small tips
 - Stamps by Tim Holtz for Stampers Anonymous: CMS155, HL-P1-005

For this tag, I stamped my cupcake, set it with my heat tool, and coloured it in with Distress markers and waterbrush.  Then I cut a mask of my cupcake out of a scrap craft tag, and used it to cover the cupcake while i went to town with the marker spritzer.  I was going for a "confetti" feel, but I think it would also do well for fireworks.  :-)  Added some sentiments, and finished it off!  :-)

More views:


'Til next time!

BAC


Sunday, April 6, 2014

Simon Monday Challenge: Anything Goes

Hello again!

This afternoon, I spent some time in my studio just playing.  The tag I came up with was created for SimonSaysStamp's Monday Challenge ("Anything Goes"), but I'm also submitting it to Inspiration Journal's April challenge ("A Few of My Favourite Things").

Here's my finished tag:


Materials/tools used:
 - Ranger Inkssentials Manila tags
 - Ranger Distress Ink: Old Paper, Salty Ocean
 - Ranger Distress Stain: Tumbled Glass
 - Ranger Archival Ink: Cobalt, Deep Purple
 - Ranger Perfect Pearls Mists: Forever Violet, Sour Apple
 - Ranger Metal Foil Tape
 - Studio 490 Clearly for Art Blackout
 - idea-ology: Grungeboard, Tiny Attacher
 - Maya Road Twine Cording Solids: Blue Raspberry
 - Ranger Heat Tool
 - Ranger Inkssentials Foam Blending Tool
 - Sizzix Big Shot
 - Sizzix dies: Mini Butterfly Set, Picture Wheel
 - Tonic Studios Craft Scissors
 - Stamps by Tim Holtz for Stampers Anonymous: CMS155
 - Tim Holtz for Stampers Anonymous Layering Stencil: Shatter
 - Xyron 2.5" sticker maker
 - Paper towels
 - Painters tape
 - Foam dots from my stash

I didn't really have any sort of set plan in my head when I was making this tag.  My only focus was to try to use products I love in some new ways, and I think I accomplished that pretty well!

The reflective squares were left over from when I used the Picture Wheel die on this January project.  I'd set them aside for future use, and ran across them while doing some straightening today.  To adhere them, I simply ran them through my Xyron.  (Be aware that grungeboard pieces are a *little* bit too thick to go through the Xyron easily.  When I was finished, I popped out the cartridge, and snapped the front bit back into place, since running these through popped it out a bit.  No permanent damage; just be aware.)

For the butterflies, I wanted to do something a bit different.  I've been loving playing with the Clearly for Art, but I have a sheet of Clearly for Art Blackout that I hadn't tried anything with yet, so I die-cut my butterflies, and decided it would be interesting to use Perfect Pearls mists to give them a bit of an iridescent look.  To get the look you see above, I sprayed the Perfect Pearls on fairly liberally and let them sit for about an hour.  I hit them with the heat tool for a little bit, and then used a paper towel to take up some of the excess liquid.  I dried them further with the heat tool, and when I noticed that the pigment was flaking off in some places, I decided to encourage that a bit by blowing on them.  Attached them to my tag, and used my heat tool to shape the wings.  And voila!  Butterflies with iridescent, but somewhat shabby, wings.  I really liked how they turned out!

Additional views:


Well, that's where a little experimentation took me today.  Where will your experimentation take you?

'Til next time!

BAC

Wednesday, April 2, 2014

A Vintage Journey: Say It with Words

Hello again!

Today's project is one I created for A Vintage Journey's Challenge #2 ("Say It with Words").  (I'll also be submitting it to SimonSaysStamp's Monday Challenge ("Anything Goes").  :-)

Here's my tag:


Materials/tools used:
 - Ranger Inkssentials Manila tags
 - Ranger Distress Ink: Dried Marigold, Mustard Seed, Old Paper, Pumice Stone, Squeezed Lemonade
 - Ranger Archival Ink: Cobalt, Jet Black
 - idea-ology: Label Letters, Tissue Tape (Commute)
 - Ranger Inkssentials Foam Blending Tool
 - Ranger Inkssentials Craft Nib Holder
 - Ranger Inkssentials Craft Nibs
 - Stamps by Tim Holtz for Stampers Anonymous: CMS149, CSS30195, CSS30201

More views:


Tuesday, April 1, 2014

Simon Wednesday Challenge: Anything Goes with Buttons

Hello all!

While you were out pranking or being pranked, I took some time today to whip up a quick tag for SimonSaysStamp's Wednesday Challenge!  This week's theme was "Anything Goes with Buttons."  I'm also submitting it to SimonSaysStamp's Monday Challenge ("Anything Goes").

Here's my tag:


Materials/tools used:
 - Ranger Inkssentials Manila tags
 - Ranger Distress Ink: Faded Jeans, Frayed Burlap, Old Paper, Stormy Sky, Weathered Wood
 - Ranger Distress Stain: Weathered Wood
 - Ranger Archival Ink: Cobalt, Cornflower Blue
 - idea-ology: Crinkle Ribbon, Tiny Attacher
 - Maya Road Twine Cording: Blueberry
 - Ranger Heat Tool
 - Ranger Inkssentials Foam Blending Tool
 - Ranger Inkssentials Mister
 - Tonic Studios: Craft Scissors, Paper Distresser
 - Stamps by Tim Holtz for Stampers Anonymous: CSS30225
 - Button, foam dots from my stash

I will admit that while I do have a small stash of buttons, they don't usually make it into my papercrafting, so this was a good challenge for me to join.  :-)  Pretty simple tag, but I like how it came out.

More views:


'Til next time!

BAC