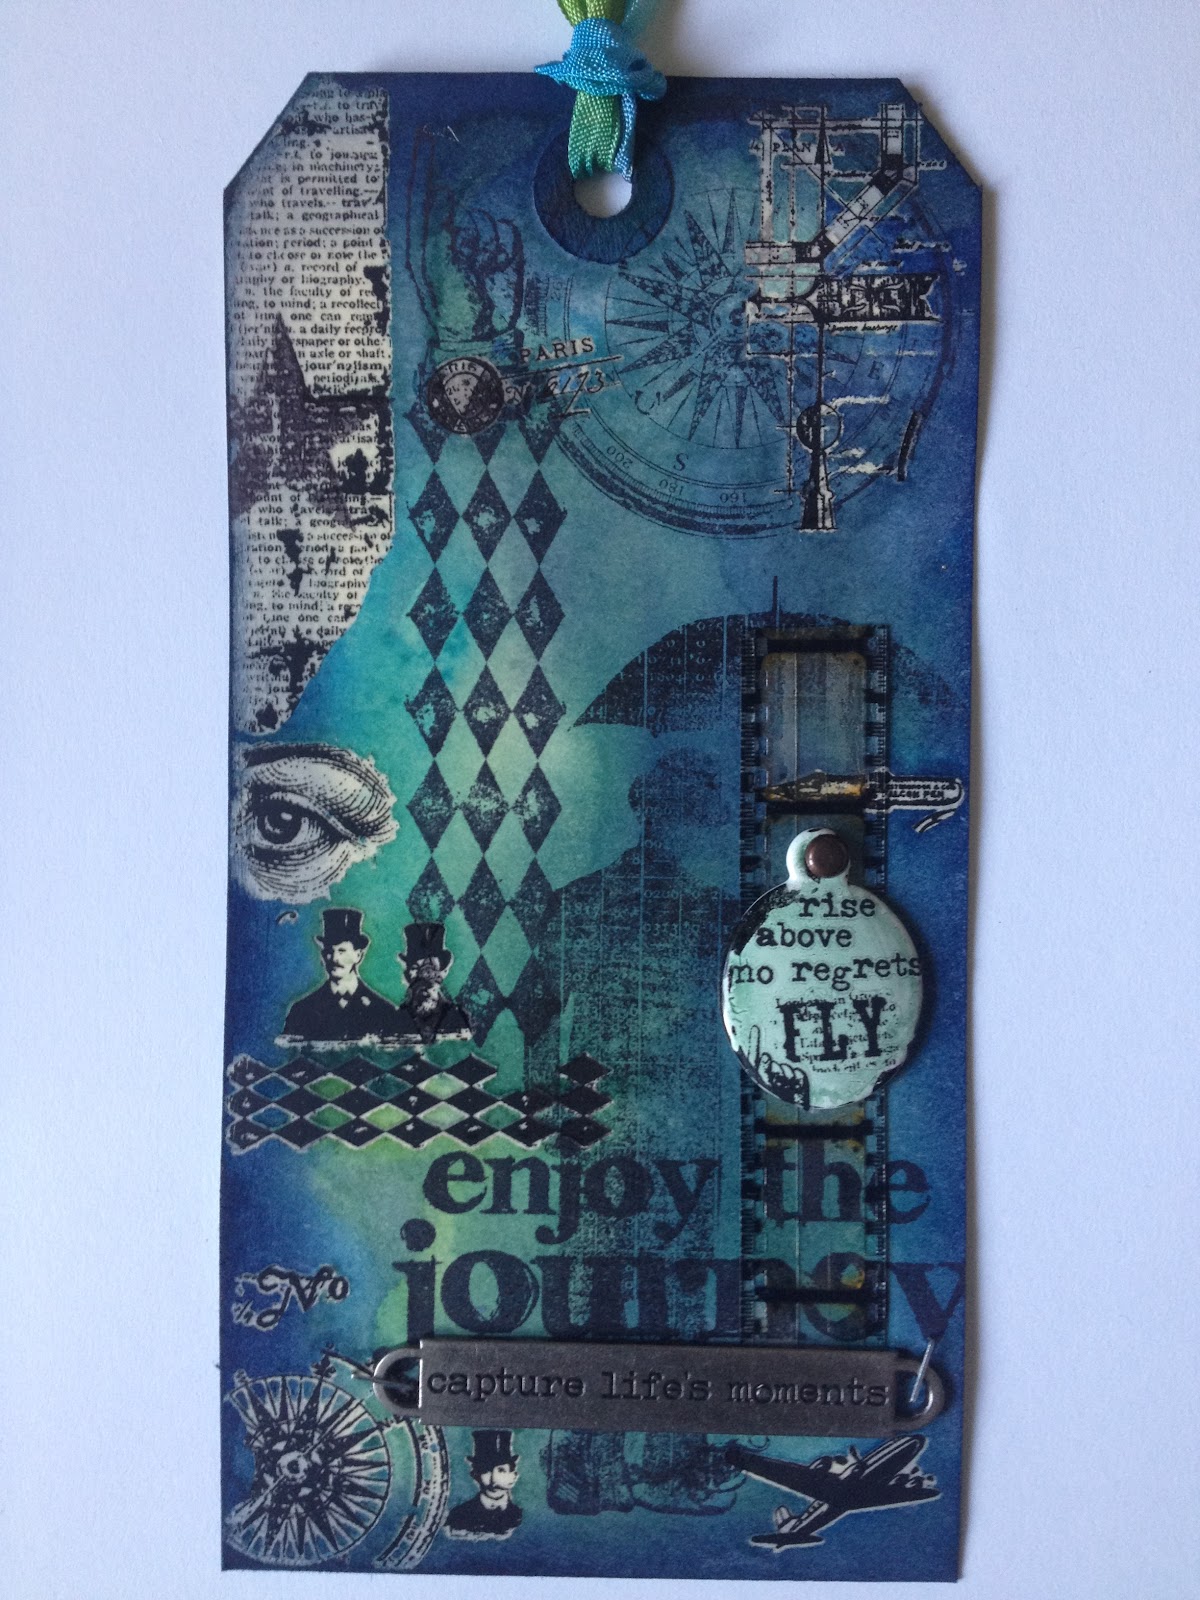
Friday, May 31, 2013

And a bonus tag for May...

There's a private group I recently joined that posts a monthly challenge.  Usually I don't have time, but this time around I decided to give it a shot.  The given theme was "Stencilating Creative heART", and here's my tag:


Materials used:
 - Ranger Inkssentials Manila Craft Tags
 - Ranger Distress Ink: Mowed Lawn, Peacock Feathers, Salty Ocean, Shaded Lilac
 - Ranger Distress Paint: Broken China, Bundled Sage, Weathered Wood
 - Ranger Distress Stain: Salty Ocean
 - Ranger Archival Ink: Cobalt, Deep Purple, French Ultramarine, Olive
 - idea-ology Crinkle Ribbon
 - Stamps by Tim Holtz for Stampers Anonymous: CSS30188, CSS30201, CSS30218
 - Dylusions 5x8 Stencil: Diamond of a Border

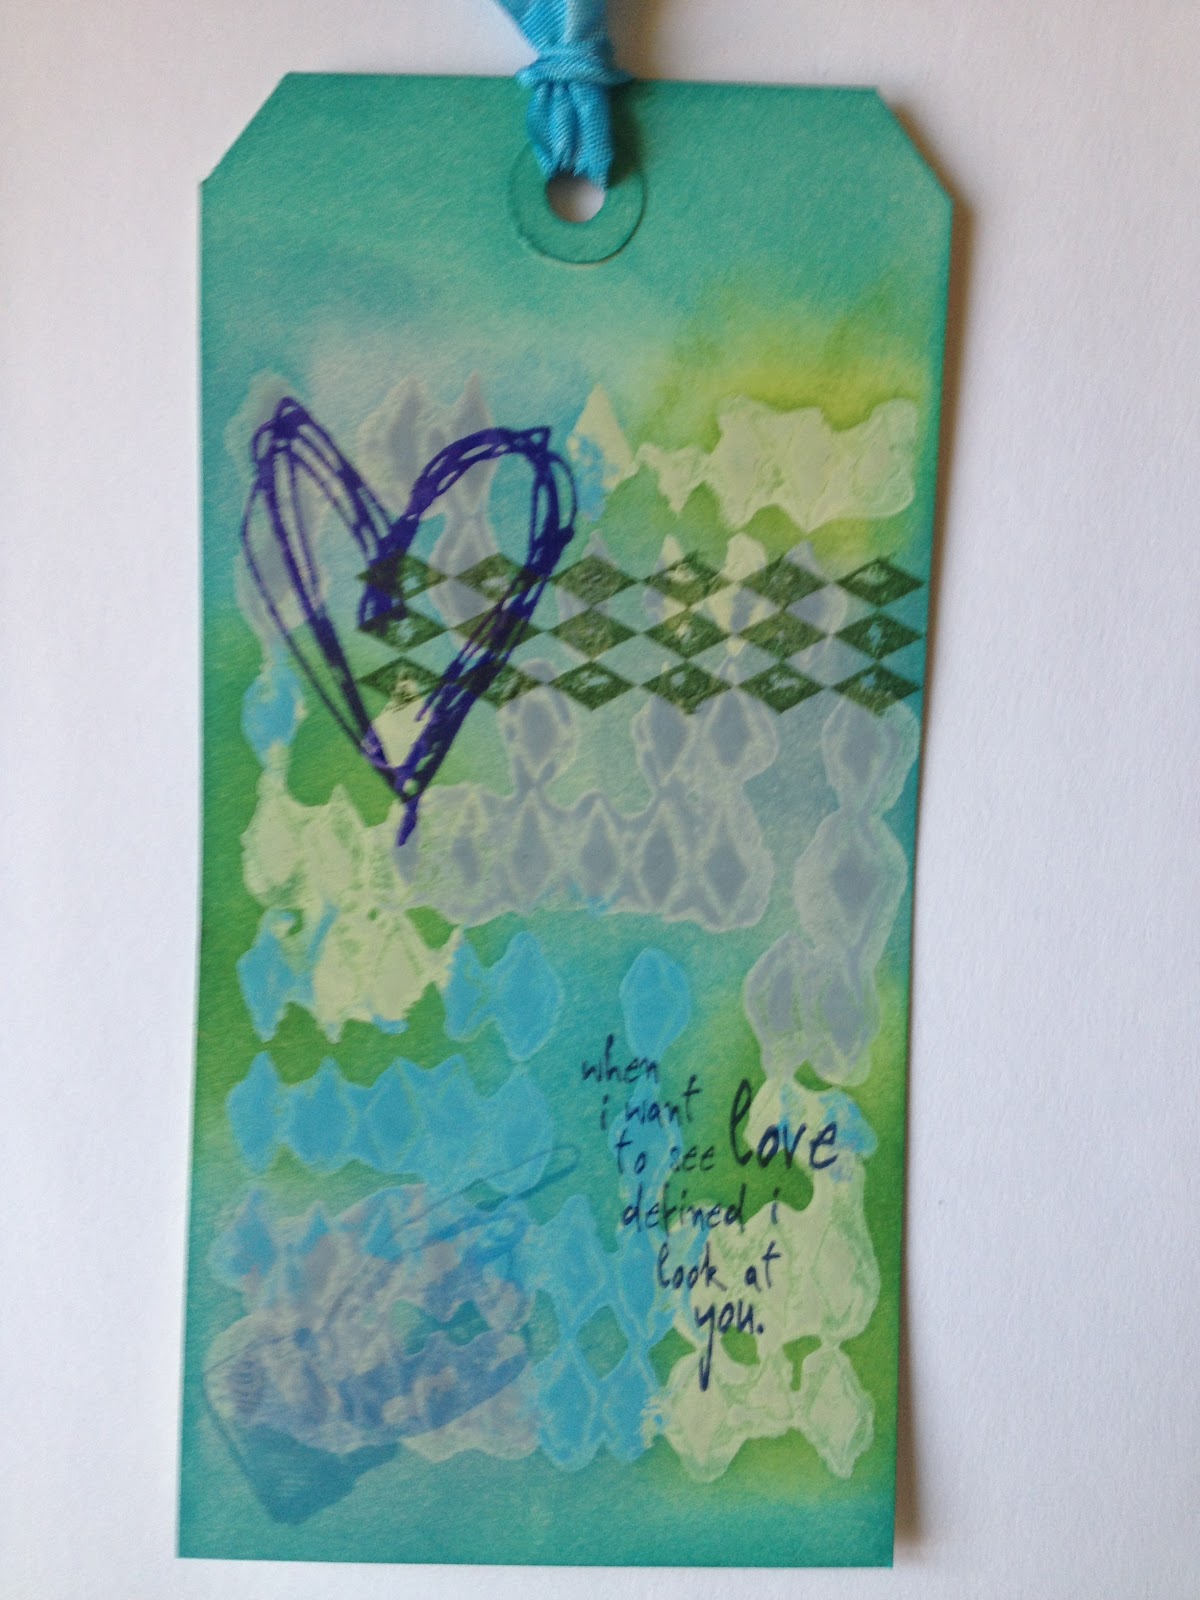
This tag wound up being more of a challenge for me than I first intended.  I started out playing with some of my Dylusions spray inks, but I had a ton of trouble getting a nice application through the stencil.  After several completely messy tags, I switched to Distress Paint.  I still had some trouble getting the stencil to lay completely flat (I may need to put it between a few heavy books for a few days!), but I think you can at least tell that there's a diamond pattern in there.  :-)  AND I got to mess around with Distress Paints resisting Distress Ink a little bit, so that was fun.  :-)
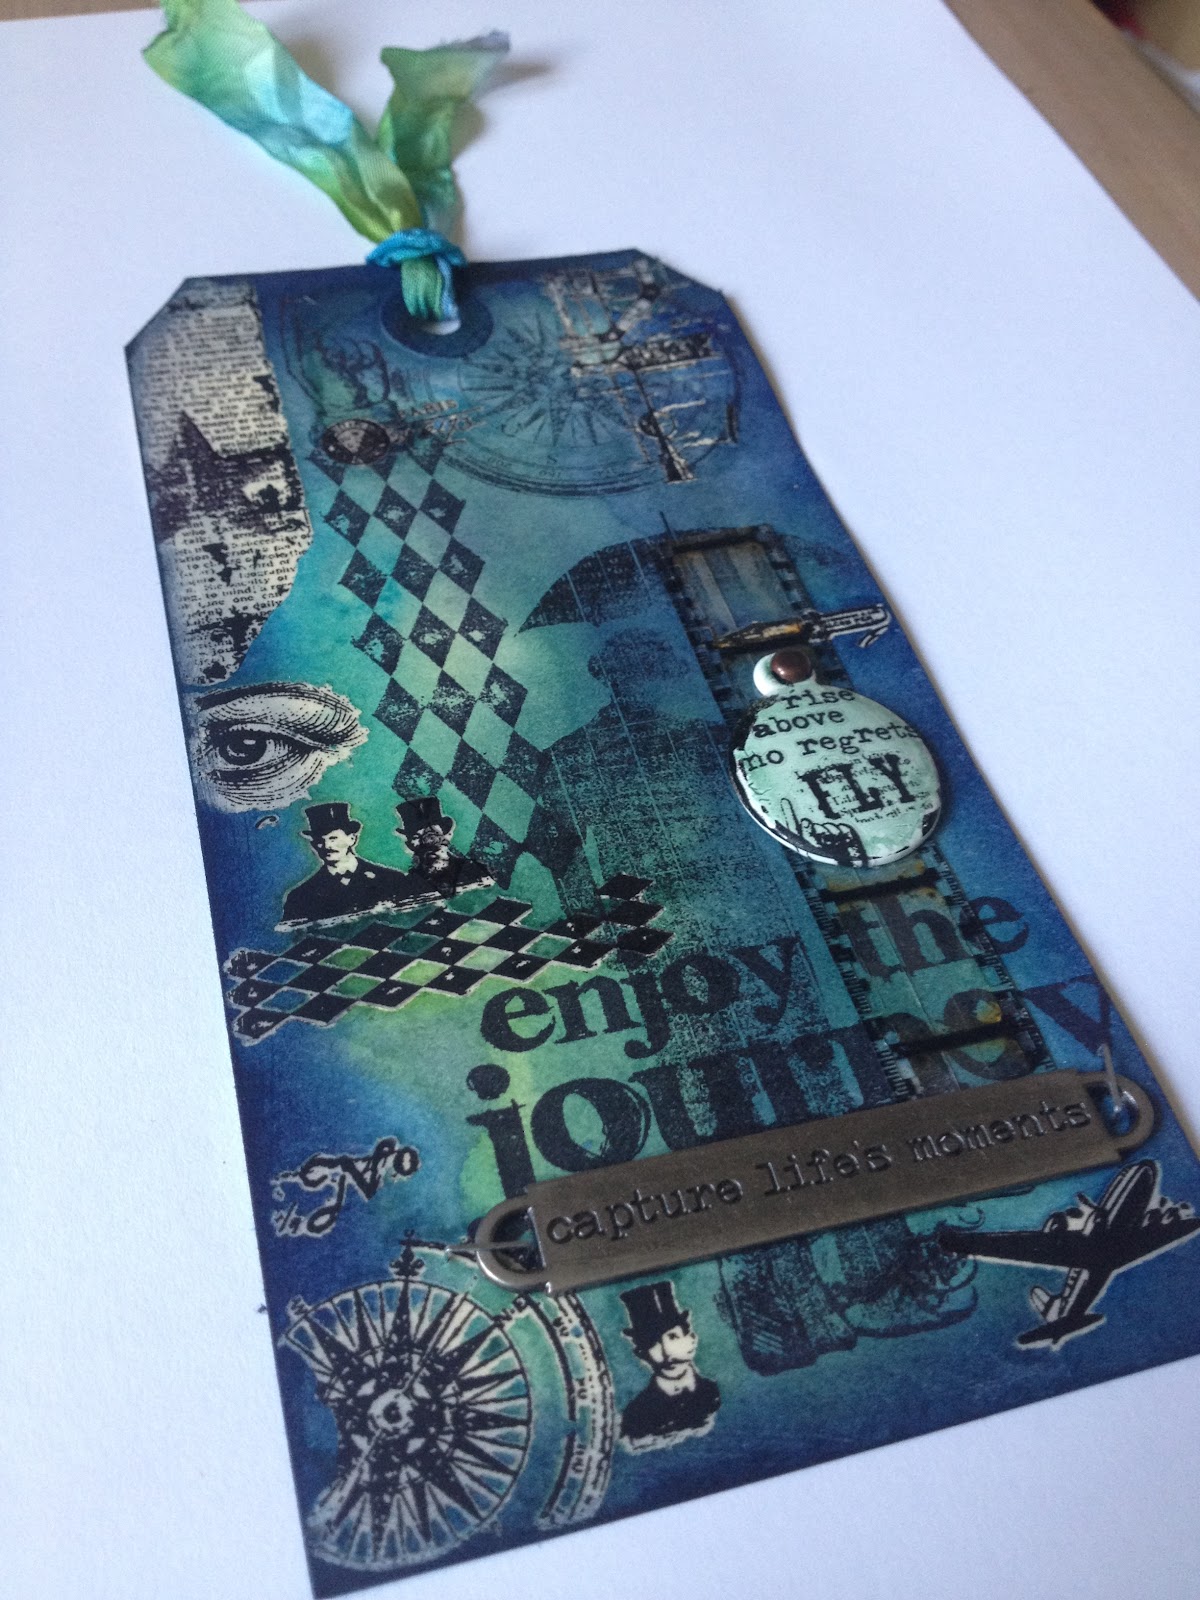
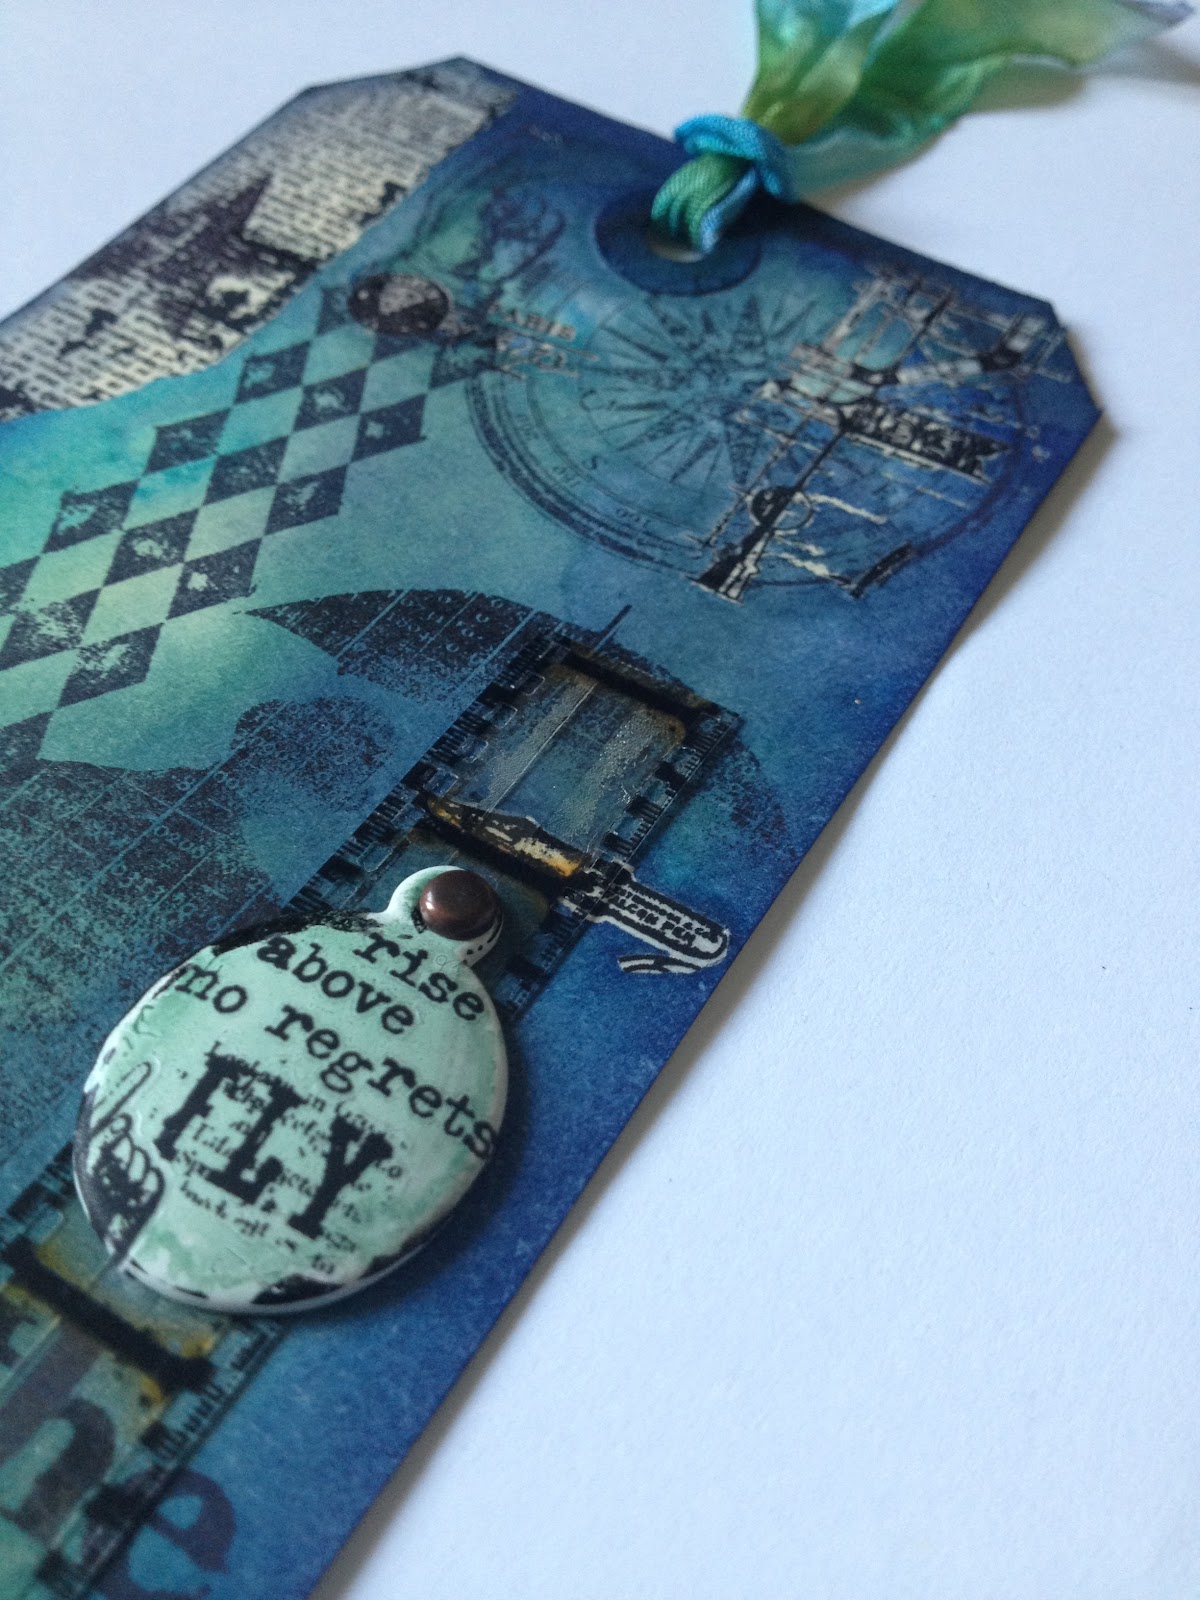
More views:


My tag is far from perfect, but it's all a learning experience, right?  I'm not giving up completely on the Dylusions inks, but I'm going to need a lot more time playing with them before I'm as comfortable with them as I am the Distress products.

Talk to you soon!
BAC

Thursday, May 30, 2013

May Tag!

Hello again!

Once again, the end of the month is looming in front of me, so I spent some time last night working on my May tag!


Materials used:
 - Ranger Inkssentials Manila Craft Tags
 - Ranger Distress Ink: Chipped Sapphire
 - Ranger Distress Stain: Broken China, Bundled Sage, Chipped Sapphire, Mowed Lawn, Salty Ocean, Shaded Lilac
 - Ranger Archival Ink: Jet Black
 - Ranger Alcohol Ink: Juniper
 - idea-ology Filmstrip Ribbon
 - idea-ology Words Bands
 - idea-ology Crinkle Ribbon
 - idea-ology Remnant Rubs: Elements, Words
 - idea-ology Enameled Tags
 - Stamps by Tim Holtz for Stampers Anonymous: CMS120, CSS25870, CSS30188, CSS30201, CSS30232
 - Fasteners and tape from my stash

This month's tag really highlights the fun you can have with the remnant rubs.  They resist Distress ink and stain, but you can stamp over them with Archival ink if you heat set it.  While the Archival ink is drying, you can wipe it off of the rubs in any places you want to show through.  This tag is a little "busier" and more cluttered than I usually like, but it was fun to make, and the more I look at it, the more I see things about it that I like.  And hey, the point of doing these is to play, right?  :-)

A couple notes about materials:
 - Tim's blog post referred to the remnant rubs as being "somewhat heat stable".  After using my heat tool to dry the Stains on my tag, I did notice a couple areas where the rubs didn't seem fully attached to the tag.  I'm not sure if I didn't rub them completely, or if they were exposed to too much heat, but it's worth being aware of.
 - Be careful when using alcohol ink to colour the Enameled Tags - the white does not seem fully fixed, particularly around the edges.  My felt was leaving little fuzzies on my tag, and I tried to use a paper towel to wipe them off, and inadvertently wiped some of the white.  I squirted a little blending solution onto the tag, and laid down more of my alcohol ink, and it came out just fine.  But be aware that the alcohol ink may destabilize the white layer on the tag until it's dry.
 - That said, I had a LOT of fun adding rubs to my tag to customize it.  That's a technique I can definitely see using a lot more in the future.  :-)

A couple more pics:


That's it for now!

'Til next time,
BAC

Wednesday, May 29, 2013

What's a Rolo?

In the comments for my April tag post, my good friend Okie Dog asked an excellent question: "what's a rolo?"

Until a few months ago, only one thing came to mind when I heard the word:


But now I have a new answer for that question: Rolos are altered rolodex cards.  I'm not sure who first had the idea to make art out of rolodex cards, but it's a fantastic one, because you can just pop them into a holder to keep them organized, and flip through whenever you want!

Rolodex cards come in a few basic sizes: 2.25x4" seems to be the most commonly traded size, but I've also seen 3x5" and 4x6".  Different sizes have their notches spaced differently, so different-sized cards require different holders.  For this reason, many traders will start with only one holder and trade for that size.  (I trade 2.25x4".)

Here are some examples of rolos I've made so far:


Other examples are in my Gallery.  :-)  You can also search for them on Google Image and Flickr.

Interested in giving altered rolos a shot?  Come join us on Swap-Bot!  In fact, I'm currently hosting a rolo swap that's open to newbies. *hint, hint*

'Til next time!

BAC